These Chocolate Chip Cookies without Brown Sugar are some of the most amazing chocolate chip cookies I've ever tasted! They are great for making with kids since they are super easy one bowl recipe.
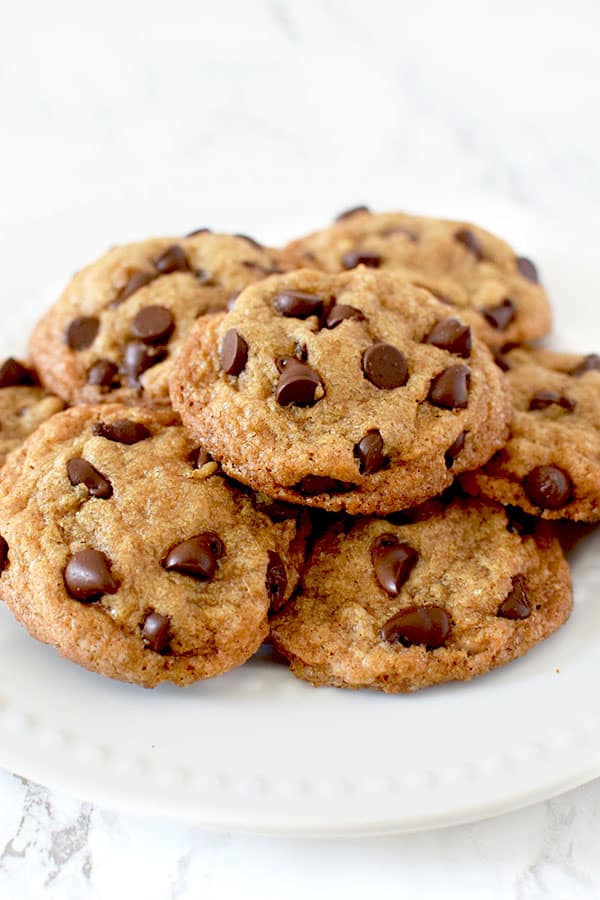
And these cookies are obvious perfect for when you run out of brown sugar!
If you like these Chocolate Chip Cookies without Brown Sugar, you may also like my Chocolate Cookies without Brown Sugar and my Oatmeal Cookies without Brown Sugar.
Or you may like my Peanut Butter Cookies without Brown Sugar.
Jump to:
- History of Chocolate Chip Cookies
- How to Measure Flour and Other Dry Ingredients
- What kind of sugar should I use?
- Do Eggs Need to Be at Room Temperature?
- What kind of sugar should I use?
- Can I use baking soda and baking powder interchangeably?
- Adjusting for a Convection Oven
- Troubleshooting
- how to store
- How to freeze
- Adjusting for a Convection Oven
- Troubleshooting
- how to store
- how to freeze
- Chocolate Chip Cookies without Brown Sugar
History of Chocolate Chip Cookies
The original chocolate chip cookie was the Toll House cookie created in Massachusetts at the Toll House Inn.
The cookies became spread from Massachusetts throughout the country thanks to World War II.
This happened because soldiers from Massachusetts shared the chocolate chip cookies they received in care packages from back home with soldiers from other states.
It wasn't long before these soldiers started writing home asking their families to send them Toll House cookies, who in turn wrote letters to Ruth Graves Wakefield, the creator of the first chocolate chip cookies, asking for the recipe.
Ruth Graves Wakefield later sold on to sell the rights to her recipe and the Toll House name to Nestlé.
Believe it or not, she sold the recipe for chocolate chip cookies for one dollar and a lifetime supply of Nestlé chocolate.
Nowadays, no self respecting cookbook or even food blog doesn't have a chocolate chip cookie recipe.
Types range from bakery style, crunchy, to soft and chewy, and more.
Oh, and after a third grade class proposed a bill, the chocolate chip cookie became the official state cookie of Massachusetts.
How to Measure Flour and Other Dry Ingredients
The best way to measure dry ingredients is with a scale, but in the United States, dry measuring cups are usually used instead.
Weighing ingredients is useful for home bakers, but it's especially important for professional bakers because they work with huge batches.
I usually use dry measuring cups when baking too, because I didn't grow up in a country that generally weighs ingredients, so please don't feel like you can't use them.
To measure most dry ingredients, first spoon them into a dry measuring cup and then level off the measuring cup with an upside-down butter knife.
Make sure not to pack it down because this will cause you to use more of the ingredient than the recipe calls for.
Brown sugar is the exception to the rule, though. To measure brown sugar, pack it into the measuring cup and then level off any excess.
To measure chocolate chips, nuts, or dried fruit, just pour them into the dry measuring cup and then level them off.
What are dry measuring cups?
Dry measuring cups are the set of cups that usually come with measuring spoons. Each cup is a different measurement, just like each spoon is a different measurement.
Liquid measuring cups, on the other hand, are the cups that usually hold more than one cup and have lines on the side that mark the measurements.
The problem with using liquid measuring cups to measure powdery dry ingredients, like flour and cocoa, is that you shake the cup to level them off. This causes the powder to settle, and you end up with more than you need.
I tested this with a friend who didn't believe me, and we ended up with a quarter cup more flour than the recipe called for.
Should I sift the flour and other dry ingredients?
It's usually recommended to sift your powdery ingredients, like flour and cocoa, before using them.
Sifting aerates the flour and removes any lumps, which helps make baked goods fluffier.
It also helps you get a more accurate measurement than when you use flour that's been packed tightly in a bag.
And sifting dry ingredients together, like flour, cocoa, and baking powder, helps make sure they're evenly distributed in the batter. Which honestly, I think is probably overrated, so I personally never bother with it.
What kind of sugar should I use?
You should use white granulated sugar, which is also called white sugar, granulated sugar, and table sugar.
If you live in the United Kingdom, you can use caster sugar instead.
You should not use powdered sugar, which is mostly used for dusting desserts and making frosting, icing, and glazes. But it is sometimes used to make fudge.
Do Eggs Need to Be at Room Temperature?
The short answer is "no."
While a lot of recipes call for room-temperature eggs, the difference is only noticeable if you do a side-by-side comparison, and even then, the difference is very slight.
How Can I Tell if My Eggs Are Still Good?
Fill a glass with cool water and submerge the eggs.
If the eggs sink to the bottom and lay flat on their side, they're still fresh.
If they sink but stand on one end at the bottom of the glass, the eggs are older but still good to use.
If an egg floats to the top, it's very old and should be checked carefully for signs of spoilage before using.
What kind of sugar should I use?
You should use white granulated sugar, which is also called white sugar, granulated sugar, and table sugar.
If you live in the United Kingdom, you can use caster sugar instead.
You should not use powdered sugar, which is mostly used for dusting desserts and making frosting, icing, and glazes. But it is sometimes used to make fudge.
Can I use baking soda and baking powder interchangeably?
No. Even though baking soda and baking powder are both leavening agents that make things rise, they work differently and aren't generally interchangeable.
When baking soda (also known as sodium bicarbonate) is combined with acidic ingredients, it makes carbon dioxide. This helps batter or dough rise and gives baked goods a light, fluffy texture.
That's why baking soda is commonly used in recipes have acidic ingredients, like buttermilk, lemon juice, vinegar, or natural cocoa powder.
Baking soda is also roughly four times as powerful as baking powder, so you don't need a lot of it. Using too much can actually give your baked goods a bitter or metallic taste.
Baking soda needs enough acid to react with it, so substituting it for baking powder can leave things flat and tasting off.
Baking powder, on the other hand, is a combination of both baking soda and an acid, so it doesn't need an acidic ingredient in the recipe to create carbon dioxide.
This makes baking powder useful in recipes that don't have enough acidic ingredients to activate baking soda. For example, it's commonly used in recipes like matzo balls and biscuits.
Because baking powder is less powerful than baking soda, recipes generally call for more of it. So, if you try to use baking soda instead of baking powder, the texture won't come out right and the flavor will probably taste disgusting.
Why do some recipes call for both?
Some recipes use both baking soda and baking powder because they do slightly different things.
For example, my chocolate cake has enough acid for baking soda to react with it, but if you'd use enough baking soda to give the cake the lift it need, it would ruin the flavor and you'd have to throw the cake out.
So, instead of adding more baking soda, the recipe uses baking powder to give additional rise.
How can I tell if baking soda and baking powder are still good?
Both baking powder and baking soda can continue to be used well past their best by dates, but they become less potent over time and can eventually stop working altogether.
To test baking soda, pour 3 tablespoons of white distilled vinegar into a small bowl, add ½ teaspoon of baking soda, and stir. The mixture should rapidly bubble if the baking soda is still active.
To test baking powder, pour 3 tablespoons of warm water into a small bowl, add ½ teaspoon of baking powder, and stir. If the baking powder is still active, it should fizz.
Adjusting for a Convection Oven
Convection ovens blow the hot air around, producing around 25 to 30 percent more heat.
Since convection ovens produce more heat, you need either lowering the temperature or shortening the cooking time to compensate.
When recipes specify temperatures and cooking times, it's for conventional ovens, unless specified otherwise.
A simple rule to follow is to lower the temperature by 25ºF. Some convection ovens offer separate settings for baking and for roasting.
You can also leave the temperature the same and instead, shorten the cooking time by 25%.
However, keep in mind, some convection ovens actually make a heat adjustment for you. That is, if you set a convection oven for 350ºF, it might actually set itself to 325ºF to compensate. So, check your manual before making adjustments.
Troubleshooting
Even though this recipe is very easy to make, life happens and things sometimes don't go as expected.
Why is it taking longer than described to bake?
Over time, the thermostat on ovens gets a little off, causing some ovens to run hot and others to run cool. This is why recipes tend to say things like "10 to 15 minutes or until golden brown."
So, if it takes you longer than expected, that's fine. Don't worry about it. Just keep baking until ready.
Why did it come out dry?
Just like some ovens run cool, others run hot. If your oven runs hot, bake these at a lower temperature.
Ideally, you should get an oven thermometer to know what temperature you're really baking at.
Why did it burn?
If you baked it for the right amount of time, then burning is usually caused by two reasons.
The first is if you put them on the lower shelf in the oven.
The second is if the bottom of your oven has food particles that dripped onto it. Even a small bit of food that drips down could cause an oven to have problems heating properly and burn the cookies.
Why did it come out too wet?
Check your measuring cups. Sometimes measuring cups aren't accurate, and if you are using different sets of wet and dry measuring cups and measuring spoons from different brands, they may not match.
I've had sets that were a ¼ cup off.
To test your sets, fill your dry and wet measuring cups with 16 tablespoons. If 16 tablespoons doesn't fill a cup, your measuring cups are too big.
If it takes you less than 16 tablespoons to fill up a cup, your spoons are too big.
I've actually mixed and matched sets of spoons and cups that are too big because they matched each other, even if they weren't accurate.
Technically, it could also be that your cups or spoons are too small, but I haven't seen that happen before.
Something went wrong, I can't even explain it... what happened?
When this has happened to me, it's been because I overstuffed the oven.
Make sure to bake the recipe on the middle shelf in the oven, and only a normal amount at a time.
I once tried to make a bunch of brownie recipes all at once, and I think I may have had something on the bottom shelf too because I was in a rush, and it came out terrible.
I can't even describe what was wrong with it. It was just very, very wrong.
how to store
Let cookies cool completely. Place in a resealable bag or an airtight container. Store at room temperature for up to a week.
How to freeze
Let cookies cool completely. It is best to freeze cookies on a tray so that they freeze as individuals. Then, move to a resealable freezer bag.
If this is not practical for you, place cooled cookies in a resealable freezer bag and freeze that way.
Cookies will keep for up to 3 months. After that, the quality begins to degrade.
When thawing baked cookies, remove from bag and let sit at room temperature.
If desired, you can gently reheat thawed cookies to mimic that fresh-baked taste and texture: place them in a 275°F or 135°C oven until soft.
Adjusting for a Convection Oven
Convection ovens blow the hot air around, producing around 25 to 30 percent more heat.
Since convection ovens produce more heat, you need either lowering the temperature or shortening the cooking time to compensate.
When recipes specify temperatures and cooking times, it's for conventional ovens, unless specified otherwise.
A simple rule to follow is to lower the temperature by 25ºF. Some convection ovens offer separate settings for baking and for roasting.
You can also leave the temperature the same and instead, shorten the cooking time by 25%.
However, keep in mind, some convection ovens actually make a heat adjustment for you. That is, if you set a convection oven for 350ºF, it might actually set itself to 325ºF to compensate. So, check your manual before making adjustments.
Troubleshooting
Even though this recipe is very easy to make, life happens and things sometimes don't go as expected.
Why is it taking longer than described to bake?
Over time, the thermostat on ovens gets a little off, causing some ovens to run hot and others to run cool. This is why recipes tend to say things like "10 to 15 minutes or until golden brown."
So, if it takes you longer than expected, that's fine. Don't worry about it. Just keep baking until ready.
Why did it come out dry?
Just like some ovens run cool, others run hot. If your oven runs hot, bake these at a lower temperature.
Ideally, you should get an oven thermometer to know what temperature you're really baking at.
Why did it burn?
If you baked it for the right amount of time, then burning is usually caused by two reasons.
The first is if you put them on the lower shelf in the oven.
The second is if the bottom of your oven has food particles that dripped onto it. Even a small bit of food that drips down could cause an oven to have problems heating properly and burn the cookies.
Why did it come out too wet?
Check your measuring cups. Sometimes measuring cups aren't accurate, and if you are using different sets of wet and dry measuring cups and measuring spoons from different brands, they may not match.
I've had sets that were a ¼ cup off.
To test your sets, fill your dry and wet measuring cups with 16 tablespoons. If 16 tablespoons doesn't fill a cup, your measuring cups are too big.
If it takes you less than 16 tablespoons to fill up a cup, your spoons are too big.
I've actually mixed and matched sets of spoons and cups that are too big because they matched each other, even if they weren't accurate.
Technically, it could also be that your cups or spoons are too small, but I haven't seen that happen before.
Something went wrong, I can't even explain it... what happened?
When this has happened to me, it's been because I overstuffed the oven.
Make sure to bake the recipe on the middle shelf in the oven, and only a normal amount at a time.
I once tried to make a bunch of brownie recipes all at once, and I think I may have had something on the bottom shelf too because I was in a rush, and it came out terrible.
I can't even describe what was wrong with it. It was just very, very wrong.
how to store
Let cookies cool completely. Place in a resealable bag or an airtight container. Store at room temperature for up to a week.
how to freeze
Let cookies cool completely. It is best to freeze cookies on a tray so that they freeze as individuals. Then, move to a resealable freezer bag.
If this is not practical for you, place cooled cookies in a resealable freezer bag and freeze that way.
Cookies will keep for up to 3 months. After that, the quality begins to degrade.
When thawing baked cookies, remove from bag and let sit at room temperature.
If desired, you can gently reheat thawed cookies to mimic that fresh-baked taste and texture: place them in a 275°F or 135°C oven until soft.
Chocolate Chip Cookies without Brown Sugar
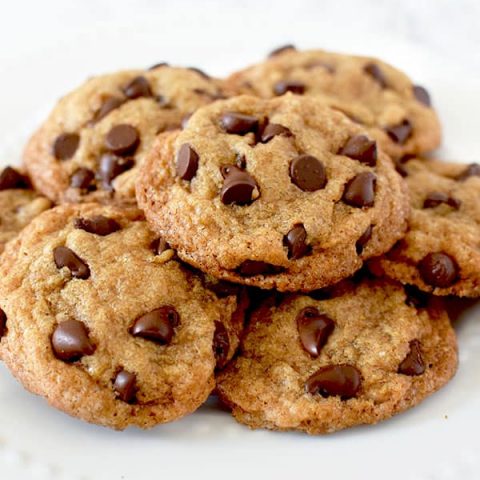
These chocolate chip cookies are the best chocolate chip cookies ever and are perfect for when you run out of brown sugar!
Ingredients
- 1 cup unsalted butter or vegan butter or vegetable shortening, softened
- 2 cup white sugar
- 2 eggs
- 1 tablespoon molasses
- 2 teaspoons vanilla extract
- 3 cups all-purpose flour
- 1 teaspoon baking soda
- ½ teaspoon baking powder
- 1 ½ teaspoon salt
- 2 cups chocolate chips or dairy free chocolate chips, plus more for decorating
Instructions
- Cream together butter and sugar until combined. Then beat in eggs, vanilla, and molasses.
- Add in flour, baking soda, baking powder, and salt. Mix until combined.
- Add chocolate chips and mix well.
- Preheat oven to 375°F or 190°C. Line three baking sheets with parchment paper and set aside.
- Roll 2-3 Tablespoons (depending on how large you like your cookies) of dough at a time into balls and place them evenly spaced on your prepared cookie sheets.
- Poke additional chocolate chips into the cookie dough balls.
- Bake for approximately 8 to 10 minutes. Take them out when they are just barely starting to turn brown.
- Let them sit on the baking pan for 5 minutes before removing to cooling rack.
Nutrition Information:
Yield:
36Serving Size:
1Amount Per Serving: Calories: 180Total Fat: 9gSaturated Fat: 5gTrans Fat: 0gUnsaturated Fat: 3gCholesterol: 14mgSodium: 145mgCarbohydrates: 26gFiber: 1gSugar: 17gProtein: 2g

Hi, I'm ElissaBeth!
I created The Taste of Kosher to give you delicious, easy-to-make recipes you can feel proud to serve. I don't believe there are bad cooks and bakers, only bad recipes. I also believe that kosher and allergy-friendly recipes can and should taste just as good as the originals, and it's my mission to prove it.