These olive oil biscuits are still soft and fluffy and are perfect with a spread or for biscuits and gravy.
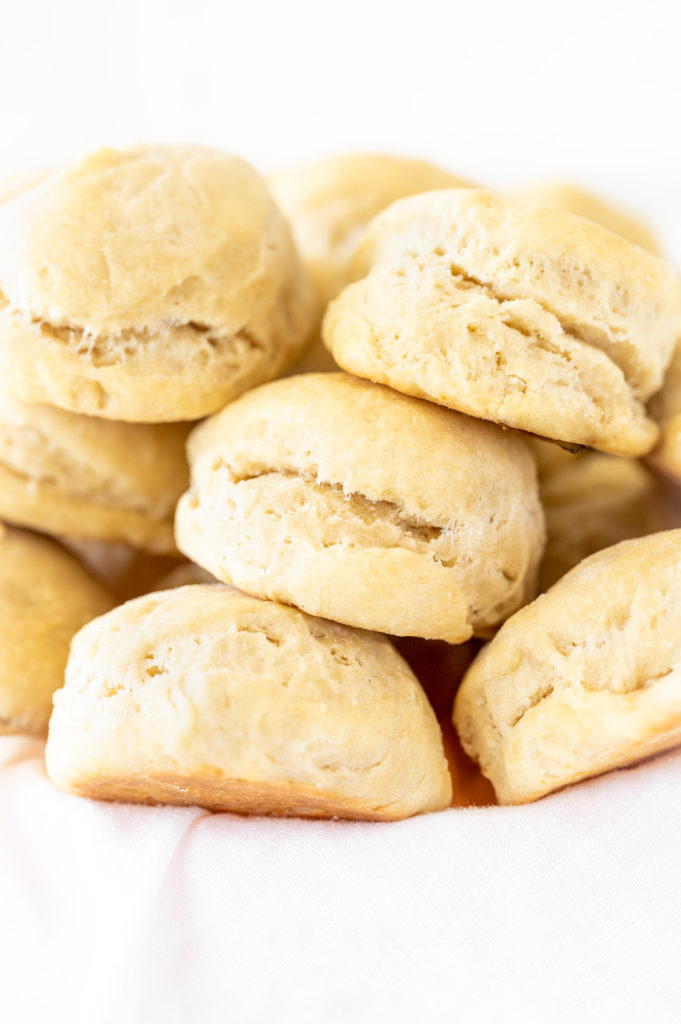
Since they are made with olive oil instead of butter, these biscuits are dairy free.
If you like these olive oil biscuits, you may also like my olive oil chocolate chip cookies!
Jump to:
- History of Biscuits
- About Dairy Free Biscuits
- How to Measure Flour and Other Dry Ingredients
- Can I use self rising flour instead?
- Why bake with oil
- What kind of sugar should I use?
- Can I use baking soda and baking powder interchangeably?
- BAKING AT HIGH ALTITUDES
- Baking with Humidity
- Adjusting for a Convection Oven
- Recipe Tip
- How to store at room temperature
- How to store in the refrigerator
- how to freeze
- How to Reheat Frozen Biscuits
- Can You Freeze Biscuit Dough?
- How to Bake Frozen Biscuit Dough
- Olive Oil Biscuits
History of Biscuits
Early European settlers in the United States brought with them a simple, easy style of cooking.
It was usually based on ground wheat and warmed with gravy as a source of cheap nutrition.
This was the foundation for biscuits.
The biscuit emerged as its own food in the early 1800s as a cheap addition to meals. It had the benefit of not requiring yeast.
At this point in time, bread was made only once a week. Also, yeast was a byproduct of making beer, commonly known as emptins.
So, if you lived in a city and close to a brewery, you had relatively easy access to it. However, if you were not so lucky, it was either difficult to attain or you had to try to make some version of it at home.
Even once panned yeast was created by the turn of the century, it was still not easy to acquire.
With due to the lack of yeast, beaten biscuits (or sea biscuits as they are known in New England) were developed. They were similar to hardtack.
These biscuits were beaten and folded to incorporate air into the dough which expanded when heated in the oven, causing the biscuit to rise.
They were beaten for anywhere from 15 minutes to 45 minutes using a rolling pin, hammer, side of an ax, or handle of a musket.
These biscuits were eaten with gravy, and it wasn't long before biscuits and gravy was created.
Then, with commercial baking powder becoming available in the middle of the century, it made the fluffy biscuit we know today possible.
About Dairy Free Biscuits
Biscuits are normally dairy because they are typically made with milk or buttermilk and butter.
However, you can make biscuits without milk by replacing the milk with dairy free milk or you can make the biscuits with water instead of milk.
And you can make biscuits without butter by replacing the butter with vegan butter, kosher margarine, or oil.
To make buttermilk biscuits without buttermilk, replace the buttermilk with a dairy free buttermilk.
Biscuits made with water, unsweetened almond milk, and neutral flavored oat milk all taste like biscuits made with regular milk.
If you want to make biscuits with coconut oil, you can use hardened coconut oil and then make the biscuits like you would with butter.
However, if you want to make biscuits with olive oil, canola oil, and other oils, you can, but the technique is slightly different. Make sure to see the instructions in the recipe.
How to Measure Flour and Other Dry Ingredients
The best way to measure dry ingredients is with a scale, but in the United States, dry measuring cups are usually used instead.
Weighing ingredients is useful for home bakers, but it's especially important for professional bakers because they work with huge batches.
I usually use dry measuring cups when baking too, because I didn't grow up in a country that generally weighs ingredients, so please don't feel like you can't use them.
To measure most dry ingredients, first spoon them into a dry measuring cup and then level off the measuring cup with an upside-down butter knife.
Make sure not to pack it down because this will cause you to use more of the ingredient than the recipe calls for.
Brown sugar is the exception to the rule, though. To measure brown sugar, pack it into the measuring cup and then level off any excess.
To measure chocolate chips, nuts, or dried fruit, just pour them into the dry measuring cup and then level them off.
What are dry measuring cups?
Dry measuring cups are the set of cups that usually come with measuring spoons. Each cup is a different measurement, just like each spoon is a different measurement.
Liquid measuring cups, on the other hand, are the cups that usually hold more than one cup and have lines on the side that mark the measurements.
The problem with using liquid measuring cups to measure powdery dry ingredients, like flour and cocoa, is that you shake the cup to level them off. This causes the powder to settle, and you end up with more than you need.
I tested this with a friend who didn't believe me, and we ended up with a quarter cup more flour than the recipe called for.
Should I sift the flour and other dry ingredients?
It's usually recommended to sift your powdery ingredients, like flour and cocoa, before using them.
Sifting aerates the flour and removes any lumps, which helps make baked goods fluffier.
It also helps you get a more accurate measurement than when you use flour that's been packed tightly in a bag.
And sifting dry ingredients together, like flour, cocoa, and baking powder, helps make sure they're evenly distributed in the batter. Which honestly, I think is probably overrated, so I personally never bother with it.
Can I use self rising flour instead?
This recipe calls for all-purpose flour, baking powder, and baking soda.
I do this to make the recipe easy for anyone to make.
However, many people use self-rising flour to make biscuits.
If you'd like to, then use 2 cups of self-rising flour instead of the all-purpose flour, baking powder, and ½ a teaspoon of salt.
Why bake with oil
Baking with oil produces a moister and tenderer texture compared to that of baked goods made with butter.
Cakes, cupcakes, muffins, and quick breads also tend to bake up taller with a better crumb and stay moist and tender much longer than recipes made with butter.
Also, since oil weighs less than butter, baked goods made with oil have a lighter texture than those made with butter.
In addition, butter is usually only 80% fat, whereas oil is 100% fat. As a result, the water that's present in butter strengthens the gluten in the flour, making it more dense and less tender than baked goods made with oil.
Oil is often used in recipes where a lighter and airier texture is desired or in recipes that call for both oil and butter, in order to have the benefits of oil while keeping the butter flavor.
What kind of sugar should I use?
You should use white granulated sugar, which is also called white sugar, granulated sugar, and table sugar.
If you live in the United Kingdom, you can use caster sugar instead.
You should not use powdered sugar, which is mostly used for dusting desserts and making frosting, icing, and glazes. But it is sometimes used to make fudge.
Can I use baking soda and baking powder interchangeably?
No. Even though baking soda and baking powder are both leavening agents that make things rise, they work differently and aren't generally interchangeable.
When baking soda (also known as sodium bicarbonate) is combined with acidic ingredients, it makes carbon dioxide. This helps batter or dough rise and gives baked goods a light, fluffy texture.
That's why baking soda is commonly used in recipes have acidic ingredients, like buttermilk, lemon juice, vinegar, or natural cocoa powder.
Baking soda is also roughly four times as powerful as baking powder, so you don't need a lot of it. Using too much can actually give your baked goods a bitter or metallic taste.
Baking soda needs enough acid to react with it, so substituting it for baking powder can leave things flat and tasting off.
Baking powder, on the other hand, is a combination of both baking soda and an acid, so it doesn't need an acidic ingredient in the recipe to create carbon dioxide.
This makes baking powder useful in recipes that don't have enough acidic ingredients to activate baking soda. For example, it's commonly used in recipes like matzo balls and biscuits.
Because baking powder is less powerful than baking soda, recipes generally call for more of it. So, if you try to use baking soda instead of baking powder, the texture won't come out right and the flavor will probably taste disgusting.
Why do some recipes call for both?
Some recipes use both baking soda and baking powder because they do slightly different things.
For example, my chocolate cake has enough acid for baking soda to react with it, but if you'd use enough baking soda to give the cake the lift it need, it would ruin the flavor and you'd have to throw the cake out.
So, instead of adding more baking soda, the recipe uses baking powder to give additional rise.
How can I tell if baking soda and baking powder are still good?
Both baking powder and baking soda can continue to be used well past their best by dates, but they become less potent over time and can eventually stop working altogether.
To test baking soda, pour 3 tablespoons of white distilled vinegar into a small bowl, add ½ teaspoon of baking soda, and stir. The mixture should rapidly bubble if the baking soda is still active.
To test baking powder, pour 3 tablespoons of warm water into a small bowl, add ½ teaspoon of baking powder, and stir. If the baking powder is still active, it should fizz.
BAKING AT HIGH ALTITUDES
The higher the altitude, the lower the air pressure and the more difficult it is to bake recipes.
Increase by 15 to 25°F or 8 to 14°C. Since leavening and evaporation happen more quickly, the higher temperature helps set the structure of baked goods before they over-expand and dry out.
However, baking at higher temperatures means products are done sooner, so decrease by 5-8 minutes per 30 minutes of baking time.
Adjustment for 3000 feet
- Reduce baking powder: for each teaspoon, decrease ⅛ teaspoon.
- Reduce sugar: for each cup, decrease 0 to 1 tablespoon.
- Increase liquid: for each cup, add 1 to 2 tablespoons.
Adjustment for 5000 feet
- Reduce baking powder: for each teaspoon, decrease ⅛ to ¼ teaspoon.
- Reduce sugar: for each cup, decrease 0 to 2 tablespoons.
- Increase liquid: for each cup, add 2 to 4 tablespoons.
Adjustment for 7000+ feet
- Reduce baking powder: for each teaspoon, decrease ¼ teaspoon.
- Reduce sugar: for each cup, decrease 1 to 3 tablespoons.
- Increase liquid: for each cup, add 3 to 4 tablespoons.
Baking with Humidity
Humidity can have a big impact on how your baked goods come out.
This is because when humidity is extremely high (think 70 percent or more), baking ingredients like flour, sugar, salt, baking powder, and baking soda soak up moisture from the air.
This can negatively impact the outcome of your cakes, cookies, yeast breads, and quick breads.
There are some things you can do to try to save your baking.
Try to counterbalance the additional moisture
To help counterbalance the additional moisture your dry ingredients soak up from the air, try reducing the amount of liquid in the recipe by about one quarter.
If the batter or dough looks too dry once all the ingredients are mixed together, add additional liquid a tablespoon at a time until you have the desired consistency.
This is not usually possible to do for cookies, but it does work for cakes and breads.
Store Ingredients in the Fridge
If flour and sugar are stored in the refrigerator or freezer rather than in a cupboard or pantry, they are better protected from humidity.
As an added benefit, keeping these ingredients cool also helps keep them fresher longer, in addition to helping them stay bug-free.
For the best results, let them warm to room temperature before using.
Bake for Longer
If you bake your goodies for a few extra minutes, it can help the liquid to cook off.
To avoid overbaking, continue testing for doneness every couple of minutes for breads, quick breads, cakes, cupcakes, and muffins. Cookies, on the other hand, need to be checked every minute.
Use Air Conditioning
To help lower humidity levels on humid summer days, air condition the room for at least an hour before you start baking.
Cooler air isn't able to hold as much moisture as warm air.
Store your baked goods in an airtight container
Humidity can also ruin your fresh-baked goods because when they are left out, they can absorb moisture.
To avoid this, store them in an airtight container or resealable bag.
Adjusting for a Convection Oven
Convection ovens blow the hot air around, producing around 25 to 30 percent more heat.
Since convection ovens produce more heat, you need either lowering the temperature or shortening the cooking time to compensate.
When recipes specify temperatures and cooking times, it's for conventional ovens, unless specified otherwise.
A simple rule to follow is to lower the temperature by 25ºF or 14ºC when baking cookies and pies, and 50ºF or 28ºC when roasting meat and poultry. Some convection ovens offer separate settings for baking and for roasting.
You can also leave the temperature the same and instead, shorten the cooking time by 25 percent. For example, if your recipe calls for 60 minutes in the oven, check the food after 45 minutes instead.
However, keep in mind, some convection ovens actually make a heat adjustment for you. That is, if you set a convection oven for 350ºF, it might actually set itself to 325ºF to compensate. So, check your manual before making adjustments.
Recipe Tip
I think it's very helpful to make these biscuits on wax paper like I do my dairy free pie crust made with oil. It makes for easier cleanup and doesn't stick as much.
How to store at room temperature
Allow the biscuits to cool completely on the baking sheet or wire rack. Then, cover individual biscuits with heavy duty aluminum foil or plastic wrap. Store in a cool and dry place.
You can also store them in an airtight container or a resealable plastic bag. However, they may not store as well.
Store for 1 to 2 days.
How to store in the refrigerator
Allow the biscuits to cool completely on the baking sheet or wire rack. Then, cover individual biscuits with heavy duty aluminum foil or plastic wrap.
Store for up to a week.
how to freeze
Let baked biscuits sit on a wire rack until completely cool. Then, wrap each biscuit tightly in heavy-duty foil or freezer wrap and store in a gallon-sized freezer bag or airtight container.
They can be stored in the freezer for 2-3 months. After that, they are still safe to eat, but the quality begins to degrade.
How to Reheat Frozen Biscuits
To reheat previously-baked biscuits, transfer the frozen biscuits to a parchment-lined baking sheet and bake in a 350°F or 175ºC oven for 15-20 minutes.
To prevent the biscuits from over-browning, lay a sheet of foil over the frozen biscuits.
Can You Freeze Biscuit Dough?
Yes. After cutting out your biscuits, arrange them on a parchment-lined baking sheet. Cover the baking sheet with plastic wrap and then transfer it to your freezer. Once the biscuits are frozen, you can transfer them to a gallon-sized freezer bag or airtight container.
Store the frozen biscuit dough for up to 3 months. After that, they are still safe to eat, but the quality begins to degrade.
How to Bake Frozen Biscuit Dough
Place the frozen biscuits on a parchment-lined baking sheet. Transfer the baking sheet to a preheated 425°F or 220ºC oven and bake for 20-25 minutes.
Olive Oil Biscuits
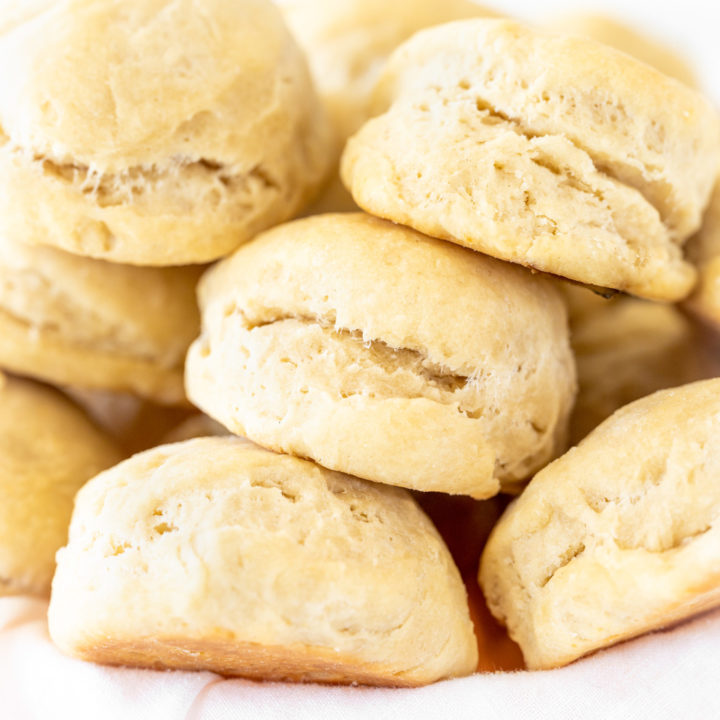
These olive oil biscuits are still soft and fluffy and are perfect with a spread or to use for biscuits and gravy
Ingredients
- 2 cups flour (250 grams)
- 1 tablespoon sugar, optional
- 1 tablespoon baking powder
- 1 teaspoon salt
- ⅓ cup olive oil (80 millilitres)
- ⅔ cup water (175 millilitres)
Instructions
- Whisk flour, sugar (if desired), baking powder, and salt together in a medium size bowl.
- Add olive oil. Mix with a fork until crumbly.
- Add water. Mix using a rubber spatula until combined into a very wet dough. If it is too wet to come together into a dough, add more flour a little at a time until it does.
- Preheat oven to 425°F or 218°C.
- Move dough to a well floured surface. Pat the surface with flour.
- Flour your hands well and knead the dough five times by pushing the dough away from you and folding it over itself.
- Use your hands, flatten the dough to ½-inch to 1-inch thick.
- Cut out biscuits as close together as possible using a biscuit cutter or the rim of a cup. 2 to 3 inches wide is ideal.
- Reshape the dough and cut again. Repeat until there is no dough left.
- Place biscuits on a parchment paper lined cookie sheet less than half an inch apart.
- Bake for 12 to 15 minutes or until tops are beginning to lightly golden brown. Remove and serve warm.
Nutrition Information:
Yield:
12Serving Size:
1Amount Per Serving: Calories: 145Total Fat: 7gSaturated Fat: 1gTrans Fat: 0gUnsaturated Fat: 6gCholesterol: 2mgSodium: 310mgCarbohydrates: 18gFiber: 1gSugar: 1gProtein: 3g