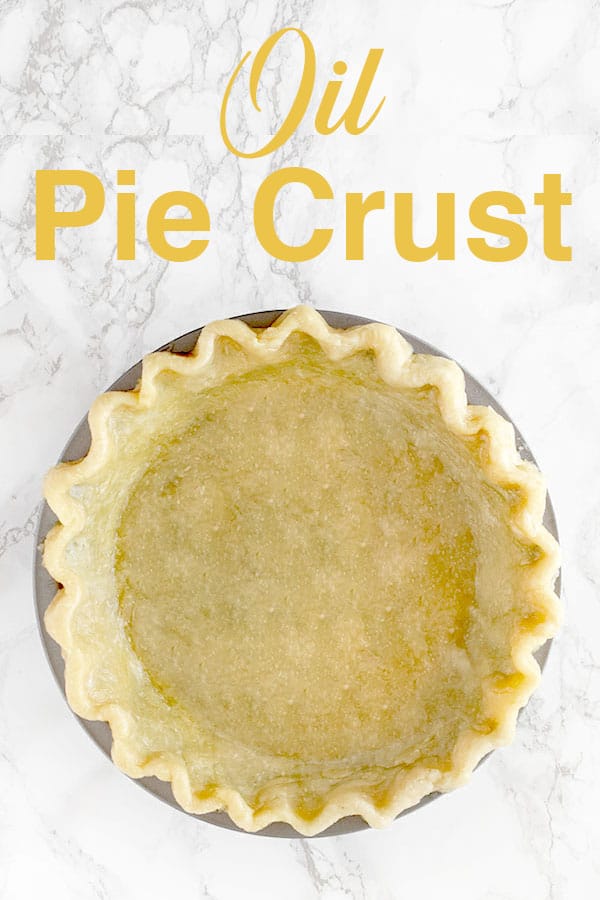

This dairy free pie crust is an oil pie crust and is made without butter. Still, it's incredibly flaky and is perfect for both sweet and savory pies, not to mention super easy to make.


What I love about this dairy free pie crust is that because uses oil instead of butter, it's so easy to make.
I’ve never successfully made an easy butter pie crust from scratch.
Then again, I didn’t really have much practice because I have little use for butter crusts.
Another thing that makes it easy is that it is a dough you can roll out.
I hate doughs that expect you to spread it with your fingers. They seem unnecessarily complicated and hard to shape.
This dairy free pie crust, however, comes together really quickly, and then all you do is roll it out and place it in the pie pan.
It really couldn’t be simpler.
Does pie crust contain dairy?
Pie crust often contains dairy, using butter or sometimes shortening. This recipe is dairy free since it uses oil instead.
Can you substitute oil for butter or shortening in pie crust?
While you can make an oil pie crust, you can't just substitute out butter or shortening for oil in a regular recipe.
This is because the technique for making a pie crust is a little different than regular pie crust.
Why add vinegar to pie dough?
The most common answer is that it affects gluten development, which in theory makes it a bit more tender. In reality, the effect is probably minimal.
However, vinegar helps protect slightly against overworking the dough and it helps keep the dough from oxidizing and turning gray - which pie dough will do if you make it ahead of time.
Types of Pies to make
Really, this crust is perfect for anything from dairy free apple pie to dairy free chicken pot pie and everything in between including dairy free sweet potato pie.
It doesn't matter if your pie is sweet or savory, this flaky crust will be perfect for it.
My personal favorite pies to make with it are dairy free pumpkin pie and dairy free pecan pie.
What's great about this crust is that it can really stand up to these pies without getting soggy.
Is the crust flaky?
Yes! This crust is incredibly flaky.
BAKING WITH OIL
Baking with oil produces a moister and tenderer texture compared to that of baked goods made with butter.
Cakes, cupcakes, muffins, and quick breads also tend to bake up taller with a better crumb and stay moist and tender much longer than recipes made with butter.
Also, since oil weighs less than butter, baked goods made with oil have a lighter texture than those made with butter.
In addition, butter is usually only 80% fat, whereas oil is 100% fat. As a result, the water that's present in butter strengthens the gluten in the flour, making it more dense and less tender than baked goods made with oil.
Oil is often used in recipes where a lighter and airier texture is desired or in recipes that call for both oil and butter, in order to have the benefits of oil while keeping the butter flavor.
Which Type Of Oil to Use
I use neutral oils like canola oil, safflower oil, and vegetable oil.
You can also use stronger oils like olive oil to make an olive oil pie crust, or even avocado oil or coconut oil, but they may change the taste somewhat.
Is it better to use canola oil or olive oil?
Canola oil is relatively cheap and, due to its lack of flavor and high smoke point, is very versatile.
Olive oil, on the other hand, is healthier. Also, its stronger flavor makes it preferable in recipes such as focaccia, which require its distinct taste.
Baking with Oil Conversion Chart
If you want to convert your butter recipes to oil recipes, take a look at my baking with oil - butter to oil conversion chart.
How to store Oil
Store oils in a cool, dark place to prevent them from becoming rancid.
If refrigerated, some oils, like olive oil, may solidify, but will return to a liquid state at room temperature.
Coconut oil begins to solidify in temperatures under 76ºF or 25ºC.
Why use baking powder
Baking powder allows the crust to become golden brown the way a butter-crust would.
Why Use Vinegar
Vinegar helps protect against overworking the dough and allows it to roll out more easily.
According to an experiment done by King Arthur Flour, it also helps prevent against dough graying when made ahead of time.
HOW TO MEASURE FLOUR AND OTHER DRY INGREDIENTS
The best way to measure dry ingredients is with a scale. However, this is not commonly done in the United States, where dry measuring cups are used instead.
To measure most dry ingredients, first spoon them into a dry measuring cup and then level off the measuring cup with an upside-down butter knife.
Make sure not to pack it down because it can lead to using more of the ingredient than called for.
The exception is brown sugar. To measure brown sugar, pack it into the measuring cup and then level off any excess.
To measure chocolate chips, nuts, or dried fruit, just pour them in and then level them off.
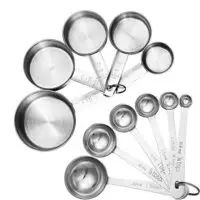
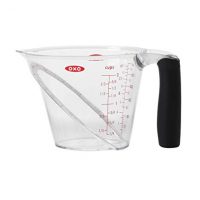
DRY VS LIQUID MEASURING CUP
Dry measuring cups are a set of cups that often come with measuring spoons. Each cup is a different measurement just like each spoon is a different measurement.
Liquid measuring cups, on the other hand, are cups that have measuring lines on the side to mark the measurements.
The problem with using liquid measuring cups to measure dry ingredients (like flour and cocoa) is that they are powders. So, as you shake the cup to level them off, the powders settle and you end up with more than you need.
I tested this with a friend who didn't believe me and we ended up with a number of tablespoons more than the recipe called for.
WHY sift Powdery Ingredients
There are a number of benefits to sifting powdery ingredients like flour and cocoa.
First of all, flour is often sifted before use to aerate it and remove any lumps. This helps in achieving a lighter texture in baked goods.
Secondly, if you measure flour that's just been sifted, you can get a more accurate measurement than from flour that's been packed tightly in a bag.
In addition, sifting dry ingredients together, such as flour, cocoa, and baking powder, helps make sure they're evenly dispersed.
BAKING SODA VS BAKING POWDER
Both baking soda and baking powder are leavening agents, which means that they help baked goods rise. However, they're not the same thing and they are not interchangeable.
Using baking soda instead of baking powder can give your recipe a terrible metallic taste, while using baking powder instead of baking soda leaves your baked goods looking flat.
BAKING SODA
When baking soda (also known as sodium bicarbonate) is combined with acidic ingredients and exposed to heat, it causes batter or dough rise and contributes to their light and fluffy texture.
However, baking soda is a versatile ingredient. It can be sprinkled over meat to tenderize it and in tomato sauce to neutralize the acidity.
Baking soda, when combined with an acid - such as cream of tartar, lemon juice, buttermilk, cocoa, and vinegar - creates carbon dioxide. When the carbon dioxide is released, it causes the familiar texture and crumb in pancakes, cakes, quick breads, soda bread.
A good rule of thumb is to use around ¼ teaspoon of baking soda per 1 cup of flour.
BAKING POWDER
Baking powder is created by combining baking soda, cream of tartar, and sometimes cornstarch.
Since baking powder already contains an acid, it's most often used when a recipe does not call for an additional acidic ingredient or calls for too little of one, such as matzo balls and biscuits.
There are two types of baking powder. Single-acting baking powder and double-acting baking power.
Single-acting baking powder gets activated only once - when it gets wet.
Most baking powder sold is double-acting. This means that the leavening occurs in two steps.
The first is when the baking powder gets wet, which is why you cannot prepare some batters ahead of time to bake later. The second step is when the baking powder is exposed to heat, which happens when the batter is baked or fried.
A good rule of thumb is to use around 1 teaspoon of baking powder per 1 cup of flour.
WHY SOME RECIPES CALL FOR BOTH
Some recipes, like chocolate cake, use both baking soda and baking powder because they need extra leavening that the baking soda alone cannot provide.
In these cases, baking soda provides an initial lift, while baking powder provides additional rise.
WHICH ONE IS STRONGER?
You may have already guessed the answer since baking soda is used to make baking powder and you need more baking powder per cup of flour. But I’ll tell you anyway.
Baking soda is four times stronger than baking powder.
That's why you will, more often than not, see recipes that only call for baking soda rather than recipes that only call for baking powder.
HOW LONG DO THEY LAST?
BAKING SODA
Baking soda is good indefinitely past its best by date, although it can lose potency over time.
A good rule of thumb is two years for an unopened package and six months for an opened package.
However, to be honest, I’ve used very old baking soda with good results.
BAKING POWDER
Like baking soda, baking powder is good indefinitely past its best by date, and can lose its potency over time.
For both opened and unopened, it’s ideal to use it within nine months to a year.
While storing it, make sure to keep it in a dry place and away from humidity.
HOW TO TEST IF IT’S STILL GOOD
BAKING POWDER
To test baking powder, pour 3 tablespoons of warm water into a small bowl, add ½ teaspoon of baking powder, and stir.
If the baking powder is good to use, it should fizz a little.
BAKING SODA
To test baking soda, pour 3 tablespoons of white distilled vinegar into a small bowl, add ½ teaspoon of baking soda, and stir.
The mixture should rapidly bubble if the soda is fresh.
Blind Baking The Crust
Blind baking is a technique used to help prevent the crust from becoming soggy and has a crisp texture.
How to Blind Bake a crust
- Cover the crust in the pie pan with baking paper or tin foil
- Fill it with pie weights, sugar, beans, or pennies and bake at 375°F or 190°C for 30 minutes
- Remove the filling and bake for another 10 minutes to brown the bottom
Can you make it ahead of time
Yes. You can make this crust up to two days in advance. Just make sure to wrap well and store in the fridge until you are ready to use it.
Can you Refrigerate pie crust overnight?
Sure. Just make sure to wrap well and store in the fridge.
How to Freeze
You can easily freeze pie crust to keep until you are ready to use.
Wrap tightly in heavy-duty aluminum foil or freezer-weight plastic wrap. Then, seal in a resealable freezer bag.
Freeze for up to 3 to 6 months. After that, it is still safe to eat, but quality will begin to degrade.
How to double the recipe
Oftentimes, recipes will be a little funny when doubled. So, I find it easiest to just make two batches and go from there.
However, this one seems to double fine.
Just shape the dough into two balls.
Then, roll them out separately and use one for the bottom crust and the other for the top crust.
Dairy Free Pie Crust

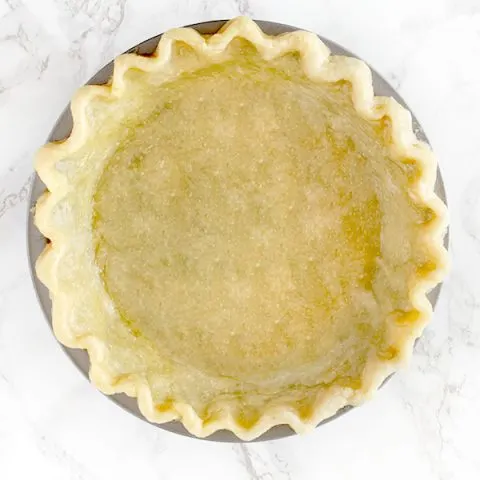
This dairy free pie crust is made out with oil is incredibly flaky. It is perfect for both sweet and savory pies.
Ingredients
- 2 cups sifted all-purpose flour (230 grams)
- 1 teaspoon salt
- pinch baking powder
- ½ cup oil (120 milliliters)
- ¼ cup cold water (60 milliliters)
- ½ teaspoon vinegar
Instructions
- Place flour, salt, and baking powder into a bowl. Whisk together.
- Add oil, water, and vinegar to the dry ingredients. Mix with a fork until the side of the bowl is clean.
- The dough should feel like Play-Doh. If it does not, add a tablespoon of water at a time until it does.
- Form into a ball. Roll it out between two pieces of wax paper. Place in the pie pan.
Notes
For a double pie crust, double the recipe.
Recommended Products
Some of the links below are affiliate links, which means that if you choose to make a purchase, I will earn a small commission. This commission comes at no additional cost to you.


Nutrition Information:
Yield:
8Serving Size:
1Amount Per Serving: Calories: 238Total Fat: 14gSaturated Fat: 1gTrans Fat: 0gUnsaturated Fat: 13gCholesterol: 0mgSodium: 269mgCarbohydrates: 24gFiber: 1gSugar: 0gProtein: 3g
The nutrition is crust per slice of pie not for the whole crust
Denyou
Wednesday 8th of April 2026
Yep! This is excellent! How do you get yours to look like how it is inthe picture though? Mine was really soft and difficult for me to transfer over to my deep pie dish. Is there a certain technique for laying into the pie dish, especially a deep one?
ElissaBeth
Wednesday 6th of May 2026
I just rolled it out between two bits of baking paper and fluted the pie crust the way I would a butter pie crust. At times where it seems to break a little, I just push it together or batch it up like I would play dough :)
JESS
Sunday 27th of October 2024
I doubled this pie crust recipe to make chicken pot pie with crust on bottom & top. It turned out absolutely PERFECT. Can’t wait to use this recipe again. Thank you! **I am curious if it would work well using avocado oil. I’m thinking of trying that next time**
ElissaBeth
Sunday 27th of October 2024
I'm glad to hear that you liked it ❤️ I don't see why it wouldn't work with avocado oil but I'd love it if you let me know how it works because I haven't personally tried it yet :)
Betty
Tuesday 26th of December 2023
Why is vinegar used in pie crust
ElissaBeth
Tuesday 26th of December 2023
It helps prevent the dough from being becoming overworked and it keeps dough from oxidizing and as a pie dough turns gray if you make it ahead of time (all pie dough, not just mine) so vinegar helps prevent that.
Beatrice
Friday 1st of December 2023
Hi, what gluten free flour would I use for turkey pie?
ElissaBeth
Tuesday 5th of December 2023
I think regular gluten free flour with a binder would work fine.
C. J.
Saturday 26th of August 2023
So easy! I even had to substitute some white whole wheat flour because I ran out of AP. I wanted a pie crust "cookie" without added sugar and this recipe did so nicely. Mixed the dough and rolled it on a rectangular silicone baking mat; used a pizza cutter to make 2 inch squares then docked them. Baked 425 for a little too long (oops) but came out deep golden brown. Ate one straight from the pan. I'll add either a lemon glaze or melted semi-sweet chocolate glaze to have something sweet without it being too heavy. Thanks ElissaBeth
ElissaBeth
Wednesday 6th of December 2023
Sounds delicious! I'll have to try that one day :) thanks for sharing