
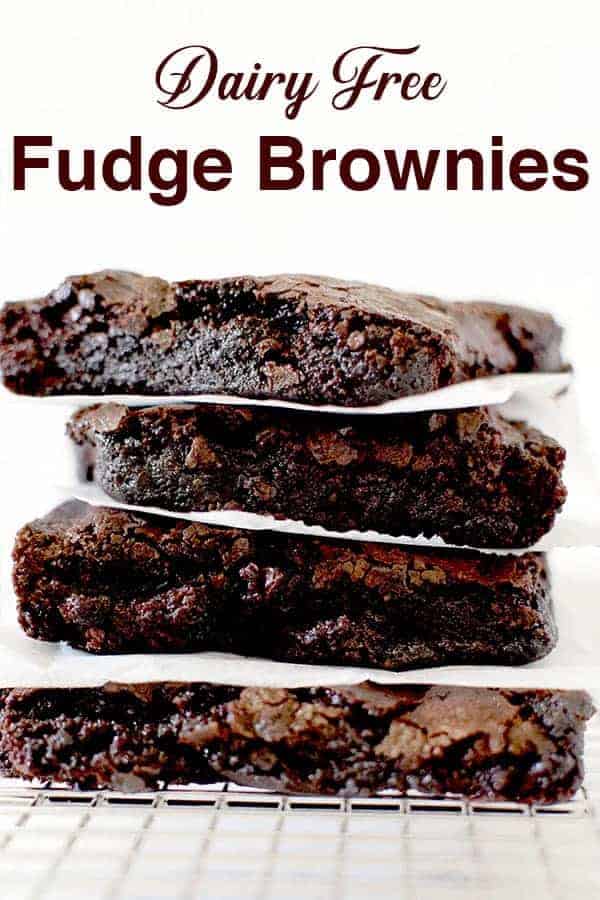
Fudge brownies are made with oil and without butter, making them extra fudgy and have a richer chocolate flavor. This one-bowl, no-melted-chocolate-needed, cocoa-only recipe couldn't be easier!
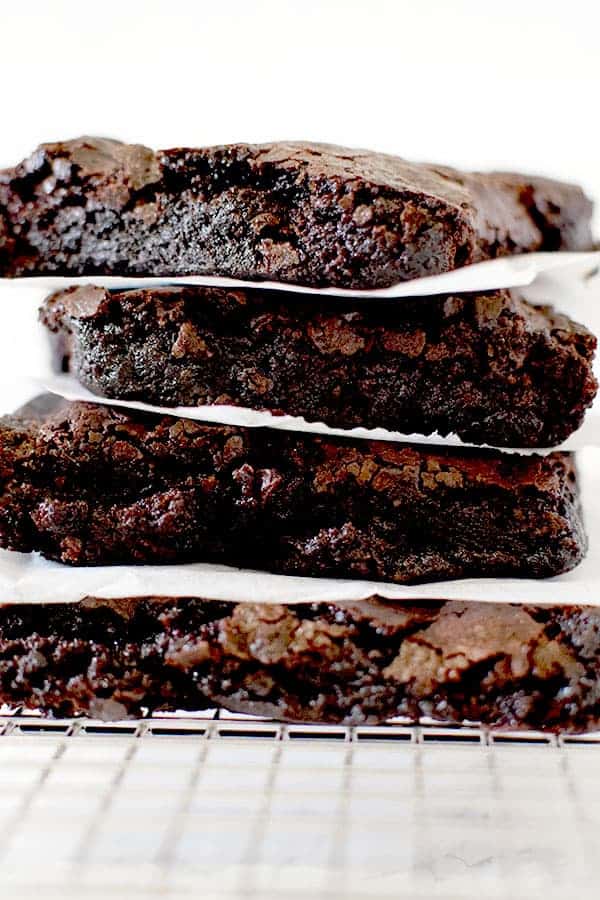
Generally, I'm not a big fan of fudge brownies, or at least not the type that is so dense it feels like you're almost biting into a piece of fudge.
I know, I know, the name "fudge brownies" does indicate that this is how it should be.
However, there is another type of fudge brownies that aren't just dense. They are thick but also extremely moist, and those I can get behind.
When I decided to make a fudge brownies recipe, I made two conditions for myself:
First, it cannot be dense and somewhat dry, instead it must be extremely moist.
Second, it cannot have melted chocolate which most fudge brownies call for.
The reason I didn't want melted chocolate is because it can be a little hard to predict.
It's not uncommon that instead of melting it skips right to dried out and burnt.
Just like you, I don't need or want any extra headache that can be avoided.
What I want and need is the easiest and simplest recipe for fudge brownies that I can make with my eyes closed but is sure to come out amazing.
So, I proudly present to you the perfect fudge brownie - at least in my opinion.
Just take a look at the photo and tell me it doesn't look amazing.
I also really love that these fudge brownies are made with oil instead of butter because it makes the chocolate extra rich!
It tastes just as good too.
Between you and me, I still lean towards my gooey brownies, but these are still incredible fudge brownies.
If you like this recipe you may also like my dairy free chocolate cake and my dairy free chocolate fudge.
Or, you may like to try one of my many other dairy free desserts.
Jump to:
- HISTORY OF BROWNIES
- How to Measure Flour and Other Dry Ingredients
- Why Does This Recipe Use Oil?
- Which Type Of Oil should i use?
- Which Type of Cocoa Should I Use?
- Sugar
- Can I use honey instead of sugar?
- How to Store Sugar
- What Kind of Vanilla Should I Use?
- Do Eggs Need to Be at Room Temperature?
- Can I Make This Without Using Eggs?
- Can I Make This Gluten Free?
- BAKING AT HIGH ALTITUDES
- Baking with Humidity
- Adjusting for a Convection Oven
- HOW TO DOUBLE THE RECIPE
- TROUBLESHOOTING
- DIY Dairy free brownie mix
- SNAFU
- how to store
- how to freeze
- Other desserts you may like:
- Fudge Brownies with Oil
HISTORY OF BROWNIES
Brownies were created by the pastry chef of the Palmer House Hotel in 1893.
Bertha Palmer, a prominent Chicago socialite and philanthropist whose husband owned the hotel, asked a pastry chef for a cake-like confection, that was smaller than a piece of cake, which would be easy to transport and could be included in boxed lunches.
Palmer was head of the Board of Lady Managers for the 1893 World's Fair and the dessert was to be given at the Women's Pavilion.
The result was the Palmer House Brownie, made of chocolate with walnuts and an apricot glaze, which The Palmer House Hotel still serves as a dessert to this day.
By 1907, the brownie were a popular dessert appearing in American cookbooks all over the country.
How to Measure Flour and Other Dry Ingredients
The best way to measure dry ingredients is with a scale, but in the United States, dry measuring cups are usually used instead.
Weighing ingredients is useful for home bakers, but it's especially important for professional bakers because they work with huge batches.
I usually use dry measuring cups when baking too, because I didn't grow up in a country that generally weighs ingredients, so please don't feel like you can't use them.
To measure most dry ingredients, first spoon them into a dry measuring cup and then level off the measuring cup with an upside-down butter knife.
Make sure not to pack it down because this will cause you to use more of the ingredient than the recipe calls for.
Brown sugar is the exception to the rule, though. To measure brown sugar, pack it into the measuring cup and then level off any excess.
To measure chocolate chips, nuts, or dried fruit, just pour them into the dry measuring cup and then level them off.
What are dry measuring cups?
Dry measuring cups are the set of cups that usually come with measuring spoons. Each cup is a different measurement, just like each spoon is a different measurement.
Liquid measuring cups, on the other hand, are the cups that usually hold more than one cup and have lines on the side that mark the measurements.
The problem with using liquid measuring cups to measure powdery dry ingredients, like flour and cocoa, is that you shake the cup to level them off. This causes the powder to settle, and you end up with more than you need.
I tested this with a friend who didn't believe me, and we ended up with a quarter cup more flour than the recipe called for.
Should I sift the flour and other dry ingredients?
It's usually recommended to sift your powdery ingredients, like flour and cocoa, before using them.
Sifting aerates the flour and removes any lumps, which helps make baked goods fluffier.
It also helps you get a more accurate measurement than when you use flour that's been packed tightly in a bag.
And sifting dry ingredients together, like flour, cocoa, and baking powder, helps make sure they're evenly distributed in the batter. Which honestly, I think is probably overrated, so I personally never bother with it.
Why Does This Recipe Use Oil?
Cakes, cupcakes, muffins, and quick breads made with oil usually bake up taller, have a better crumb, and a lighter texture than ones made with butter.
They also tend to stay moist and tender longer.
In fact, some recipes call for both oil and butter, instead of only butter, if they want a lighter and airier texture while still keeping the butter flavor.
I created a baking with oil - butter to oil conversion chart for you in case you want to convert some of your butter recipes to oil recipes.
Which Type Of Oil should i use?
I don't specify in the recipe which type of oil to use because it's mostly personal preference and I don't want anyone to feel they have to use specifically that type of oil. For the most part, you can use whatever oil you feel most comfortable using.
I use neutral oils like canola oil, safflower oil, and vegetable oil.
You can also use stronger oils like olive oil and coconut oil, but keep in mind that they may change the taste somewhat.
If you're going to use olive oil, use the one labeled pure olive oil because it has the mildest flavor. This should make the flavor a lot less noticeable.
Is It Better to Use Canola Oil or Olive Oil?
Canola oil is relatively cheap and, due to its lack of flavor and high smoke point, is very versatile.
Olive oil, on the other hand, is generally considered a healthier choice.
So, really, it's whatever you prefer.
How to Store Oil
Store oils in a cool, dark place to prevent them from becoming rancid.
If you store them in the fridge, some oils, like olive oil, may solidify and look strange, but don't worry, they'll return to normal at room temperature.
Coconut oil begins to solidify in temperatures under 76°F or 25°C.
Which Type of Cocoa Should I Use?
When a recipe calls for cocoa, always use unsweetened cocoa powder, unless specified otherwise.
This allows you to have better control of the sweetness of what you're making.
There are three basic forms of unsweetened cocoa powder: natural cocoa powder, Dutch-processed cocoa powder, and raw cacao powder.
Natural cocoa powder is your basic non-specialty cocoa powder, and it's the one you should use natural unsweetened cocoa powder for this recipe.
Natural cocoa powder is the most commonly used type of cocoa powder and is what you should use in most recipes, such as brownies, chocolate cupcakes, hot chocolate, or any recipe that simply says "cocoa powder."
Can I Use Dutch-Processed Cocoa Powder?
Dutch-processed cocoa powder starts with cocoa beans that have been treated with potassium carbonate, which neutralizes their acidity.
Since Dutch-processed cocoa powder is not acidic, it does not react with baking soda the way natural cocoa powder does.
Recipes that rely on natural cocoa powder for the acidity to trigger the baking soda may not rise properly if you replace the natural cocoa with Dutch-processed cocoa.
For this recipe, I recommend sticking with natural cocoa powder, though I have had readers who switched it out and liked the results. So if you want to try it, that's totally up to you.
Can I Use Raw Cacao Powder?
Raw cacao powder is different from natural and Dutch-processed cocoa powders.
It's made from the cacao bean and isn't nearly as processed. It comes from seeds that have been fermented and are processed at low temperatures to ensure that their nutritional benefits and bitter flavor are preserved.
You can use raw cacao powder if you really want to, but I don't recommend it, since it's not as absorbent as cocoa powder, and it may cause the recipe to be too liquidy and not bake properly.
Can I Use Sweetened Cocoa?
Sweetened cocoa is natural cocoa powder mixed with sugar.
Please don't use it when making this recipe because it will make it too sweet.
How to Substitute Chocolate With Cocoa Powder in Recipes
This recipe calls for cocoa powder, so you really don't need to worry about this here, but I've found this so helpful (and honestly, I had to work hard to figure this out) so I'm sharing it with you anyway.
It's also really useful if you pair this recipe with another recipe that calls for melted chocolate, so I'm including it in case you need it...
Just make sure to mix the ingredients together in a bowl first before adding them to the rest of the recipe.
Cocoa Substitute for Sweet Baking Chocolate
To replace 4 ounces of sweet baking chocolate, use ¼ cup unsweetened cocoa powder plus ⅓ cup sugar and 3 tablespoons oil.
Cocoa Substitute for Semisweet and Bittersweet Baking Chocolate
To replace 4 ounces of semisweet and bittersweet chocolate, use ¼ cup unsweetened cocoa powder plus 2 ½ tablespoons sugar and 3 tablespoons oil.
Cocoa Substitute for Unsweetened Baking Chocolate
To replace 4 ounces of unsweetened chocolate, use ¼ cup unsweetened cocoa powder plus 3 tablespoons oil.
How to Store Cocoa
Store cocoa in an airtight container and keep it in a cool, dark place to prevent it from absorbing moisture and losing flavor.
Pro Tip: I store cocoa powder in a large canister so it doesn't make a mess when I go to use it. Doing this has made baking with cocoa so much easier and way less messy!
Sugar
The primary role of sugar is to be a sweetener. However, sugar also contributes to the tenderness and moistness of the baked good by absorbing and retaining moisture and helps create the golden brown color when baking as it caramelizes.
Recipes with more sugar often result in softer, moister textures. However, I learned the hard way that too much sugar leads to a sticky mess.
When it's heated, sugar caramelizes, resulting in a rich, complex flavor and a brown color. This adds both flavor and color to baked goods and is also the process in which caramel sauce, dulce de leche, caramel candies, and regular candies are made.
When used in recipes containing yeast, the sugar is eaten by the yeast, producing carbon dioxide and causing the dough to rise.
Sugar also acts as a preservative in jams, jellies, and fruit preserves by reducing water activity and preventing microbial growth.
There are many different types of sugar, including white sugar, brown sugar, vanilla sugar, powdered sugar, turbinado sugar, and demerara sugar.
When a recipe calls for "sugar" without specifying anything else, it's referring to regular white sugar.
White Sugar
White sugar (sometimes called granulated sugar, table sugar, or white granulated sugar) is made of either beet sugar or cane sugar, which has undergone a refining process.
It is the easiest to find and most commonly used.
Brown Sugar
Brown sugar is white sugar with molasses added to it.
It is commonly used in chocolate chip cookie recipes, and it's rare for a recipe that calls for brown sugar not to also call for white sugar as well.
When a recipe calls for "brown sugar" but doesn't specify what type (light or dark), it is referring to light brown sugar.
In my recipes, you can use whatever type of brown sugar you have on hand, whether it is dark brown sugar, light brown sugar, or demerara sugar - which is very common in Israel.
Just keep in mind that the flavor and color will be slightly different, depending on what you choose to use.
Turbinado Sugar
Turbinado sugar is better known as "raw sugar." But, despite this name, the sugar is not really "raw."
Instead, it's partially refined sugar that retains some of the original molasses.
The term "raw sugar" may also give off the impression that it is somehow healthier.
In reality, turbinado sugar is nutritionally similar to white sugar.
Demerara Sugar
Demerara sugar is very popular in Israel and is especially delicious in tea, but is also used for baking.
Unlike white sugar, demerara sugar undergoes minimal processing and retains some vitamins and minerals.
However, it is still not much healthier than white sugar.
Vanilla Sugar
Vanilla sugar is not very common in the States. However, it is common in Israel and parts of Europe.
This is sugar that sat for an extended period of time with vanilla beans, giving it a vanilla flavor.
Caster Sugar
This type of sugar is common in the United Kingdom.
It has a grain finer than white (granulated) sugar and larger than powdered sugar.
Caster sugar is often called for in recipes for delicate baked goods like meringues, souffles, and sponge cakes.
You can use a 1:1 conversion rate between caster sugar and white (granulated) sugar.
Powdered sugar
Powdered sugar, sometimes known as confectioners' sugar, is a sugar with a powdered texture.
This sugar is rarely used for baking. Instead, it is used for dusting desserts and making frosting, icing, and glazes.
In some countries, you can also find powdered vanilla sugar.
It is made the exact same way regular vanilla sugar is made. However, the sugar used is powdered instead of granulated.
Can I use honey instead of sugar?
If you'd prefer to use honey instead of sugar, like I do in my honey challah recipe, you can. However, it may change the taste and texture somewhat.
Honey is sweeter than sugar, so you don't need as much of it. As a general rule, use ¾ cup of honey for every 1 cup of sugar.
- 1 cup sugar → ¾ cup honey
- ¾ cup sugar → ⅔ cup honey
- ½ cup sugar → 6 tablespoons honey
- ¼ cup sugar → 3 tablespoons honey
Honey also adds liquid to the recipe, so you'll need to reduce the other liquid. For every cup of sugar you replace with honey, reduce the other liquid by about 3 to 4 tablespoons.
- 1 cup honey → remove 3 to 4 tablespoons liquid
- ¾ cup honey → remove about 2¼ to 3 tablespoons liquid
- ½ cup honey → remove about 1½ to 2 tablespoons liquid
- ¼ cup honey → remove about 1 tablespoon liquid
If there isn't enough liquid in the recipe to remove, you can remove it from the egg whites instead, but NEVER remove it from the oil.
Honey also causes baked goods to brown more quickly. For this reason, avoid using honey in recipes that need to be baked at temperatures above 350°F or 175°C.
How to Store Sugar
Sugar should be stored in an airtight container to prevent clumping and moisture absorption, and kept in a cool, dry place.
What Kind of Vanilla Should I Use?
There are several types of vanilla you can use in baking, including vanilla extract, imitation vanilla, vanilla paste, and vanilla beans.
For everyday baked goods like muffins, cakes, cookies, and quick breads, some options are more practical than others.
Vanilla Extract
Vanilla extract is made by soaking vanilla beans in alcohol, which extracts the compounds responsible for their flavor. It is the most common type of vanilla used in baking.
When a recipe-including mine-calls for vanilla extract or simply says "vanilla," this is the type of vanilla that is generally being referred to.
Can I use imitation vanilla?
Imitation vanilla, also called artificial vanilla or vanilla essence, is considerably less expensive than pure vanilla extract and works well in everyday baked goods.
Since vanilla extract can be expensive, you can use imitation vanilla in my recipes without a problem.
Imitation vanilla can be used spoon for spoon in place of pure vanilla extract.
Though, keep in mind that some imitation vanillas are better than others, so if you can, try to use a good one.
Can I use vanilla paste?
Vanilla paste is a thick mixture containing vanilla bean seeds and vanilla extract. Commercial vanilla pastes may also contain sweeteners, thickeners, or other ingredients.
It can generally be used in place of vanilla extract and leaves visible flecks of vanilla bean in your baked goods.
Vanilla paste can generally be substituted for vanilla extract spoon for spoon.
Can I use vanilla beans?
Vanilla beans are the pods of vanilla orchids. The seeds inside the pod can be scraped out and added directly to a recipe.
Vanilla beans are more expensive and less convenient than extract, so I wouldn't recommend them for everyday baking.
But if you want to, you can use about 1 teaspoon of vanilla extract for each inch of vanilla bean called for in a recipe.
This is only an approximation, since vanilla beans vary in size and strength.
Can I use vanilla sugar?
Vanilla sugar is sugar that has been flavored with vanilla. It is particularly common in Europe and parts of the Middle East, including Israel.
It can be made by storing vanilla beans in sugar, mixing vanilla bean powder with sugar, or combining sugar with vanilla extract. Some countries also sell vanilla powdered sugar for use in confections.
You can substitute vanilla extract with vanilla sugar spoon for spoon.
How Should I Store Vanilla?
Keep vanilla extract and other vanilla products away from heat and direct light. Store them in an airtight container in a cool, dark place.
Do Eggs Need to Be at Room Temperature?
The short answer is "no."
While a lot of recipes call for room-temperature eggs, the difference is only noticeable if you do a side-by-side comparison, and even then, the difference is very slight.
Are Eggs Dairy?
No, eggs are not dairy.
Dairy is milk and any food products made from milk, including cheese, cream, butter, and yogurt.
So, while eggs are an animal product, they are not dairy.
Recipes like pancakes without milk are dairy free even though they contain eggs, since they do not use milk or butter.
If this sounds like a silly question to you, you'd be surprised how many people think eggs are dairy because they're in the refrigerated section of the supermarket.
How Can I Tell if My Eggs Are Still Good?
Fill a glass with cool water and submerge the eggs.
If the eggs sink to the bottom and lay flat on their side, they're still fresh.
If they sink but stand on one end at the bottom of the glass, the eggs are older but still good to use.
If an egg floats to the top, it's very old and should be checked carefully for signs of spoilage before using.
Can I Make This Without Using Eggs?
Yes, just replace each egg with ¼ cup of water.
Or try my dairy free eggless brownies instead since they're also dairy free.
How Do I Replace Eggs in Recipes?
After being asked by a mother how she could make one of my dairy free recipes for her child who is allergic to eggs, I did a lot of research into it and started making egg free recipes too. I'm here to help you know 🙂
So, if you want to make pretty much any recipe eggless, here's how you do it:
Eggs do three things in most recipes: they help bind the ingredients together, help them rise, and add moisture.
For example, eggs are the primary binder in a pumpkin pie, creating a sliceable custard, but in my chewy brownies they mostly just help them rise.
So, to replace eggs in fluffy things like eggless chocolate cakes and eggless cornbread, use ¼ cup of water per egg called for.
For cookies like my eggless chocolate chip cookies, use 2 tablespoons of water in place of each egg.
In pies like eggless pumpkin pie or in recipes like eggless meatloaf, and really anything that uses eggs as a binder, use 1 tablespoon of cornstarch and ⅓ cup of water per egg. Though don't try this with matzo balls, because it doesn't work-believe me, I've tested it and ended up with a big mess.
Can I Make This Gluten Free?
Yes.
There are gluten-free all-purpose flour blends you can use that replace all-purpose flour cup for cup.
Or try my dairy free gluten free brownies.
You can also use oat flour, which is made from whole oats that have been ground into a powder. You can easily make it yourself using a food processor. To make 1 cup of oat flour, blend 1 ¼ cups of oats in a food processor until finely ground.
To substitute all-purpose flour with oat flour, use 1 ⅓ cups of oat flour for each cup of all-purpose flour called for in the recipe.
Or try my dairy free oat flour brownies.
Note: Oats must be marked gluten-free because they can be cross-contaminated at the factory.
BAKING AT HIGH ALTITUDES
The higher the altitude, the lower the air pressure and the more difficult it is to bake recipes.
Increase by 15 to 25°F or 8 to 14°C. Since leavening and evaporation happen more quickly, the higher temperature helps set the structure of baked goods before they over-expand and dry out.
However, baking at higher temperatures means products are done sooner, so decrease by 5-8 minutes per 30 minutes of baking time.
Adjustment for 3000 feet
- Reduce baking powder: for each teaspoon, decrease ⅛ teaspoon.
- Reduce sugar: for each cup, decrease 0 to 1 tablespoon.
- Increase liquid: for each cup, add 1 to 2 tablespoons.
Adjustment for 5000 feet
- Reduce baking powder: for each teaspoon, decrease ⅛ to ¼ teaspoon.
- Reduce sugar: for each cup, decrease 0 to 2 tablespoons.
- Increase liquid: for each cup, add 2 to 4 tablespoons.
Adjustment for 7000+ feet
- Reduce baking powder: for each teaspoon, decrease ¼ teaspoon.
- Reduce sugar: for each cup, decrease 1 to 3 tablespoons.
- Increase liquid: for each cup, add 3 to 4 tablespoons.
Baking with Humidity
Humidity can have a big impact on how your baked goods come out.
This is because when humidity is extremely high (think 70 percent or more), baking ingredients like flour, sugar, salt, baking powder, and baking soda soak up moisture from the air.
This can negatively impact the outcome of your cakes, cookies, yeast breads, and quick breads.
There are some things you can do to try to save your baking.
Try to counterbalance the additional moisture
To help counterbalance the additional moisture your dry ingredients soak up from the air, try reducing the amount of liquid in the recipe by about one quarter.
If the batter or dough looks too dry once all the ingredients are mixed together, add additional liquid a tablespoon at a time until you have the desired consistency.
This is not usually possible to do for cookies, but it does work for cakes and breads.
Store Ingredients in the Fridge
If flour and sugar are stored in the refrigerator or freezer rather than in a cupboard or pantry, they are better protected from humidity.
As an added benefit, keeping these ingredients cool also helps keep them fresher longer, in addition to helping them stay bug-free.
For the best results, let them warm to room temperature before using.
Bake for Longer
If you bake your goodies for a few extra minutes, it can help the liquid to cook off.
To avoid overbaking, continue testing for doneness every couple of minutes for breads, quick breads, cakes, cupcakes, and muffins. Cookies, on the other hand, need to be checked every minute.
Use Air Conditioning
To help lower humidity levels on humid summer days, air condition the room for at least an hour before you start baking.
Cooler air isn't able to hold as much moisture as warm air.
Store your baked goods in an airtight container
Humidity can also ruin your fresh-baked goods because when they are left out, they can absorb moisture.
To avoid this, store them in an airtight container or resealable bag.
Adjusting for a Convection Oven
Convection ovens blow the hot air around, producing around 25 to 30 percent more heat.
Since convection ovens produce more heat, you need either lowering the temperature or shortening the cooking time to compensate.
When recipes specify temperatures and cooking times, it's for conventional ovens, unless specified otherwise.
A simple rule to follow is to lower the temperature by 25ºF or 14ºC when baking cookies and pies, and 50ºF or 28ºC when roasting meat and poultry. Some convection ovens offer separate settings for baking and for roasting.
You can also leave the temperature the same and instead, shorten the cooking time by 25 percent. For example, if your recipe calls for 60 minutes in the oven, check the food after 45 minutes instead.
However, keep in mind, some convection ovens actually make a heat adjustment for you. That is, if you set a convection oven for 350ºF, it might actually set itself to 325ºF to compensate. So, check your manual before making adjustments.
HOW TO DOUBLE THE RECIPE
If you double the recipe you will need a 9 x 13-inch pan.
The area of a square or rectangular pan is calculated by multiplying one side times the other side.
This recipe calls for an 8-inch square pan so an 8 x 8 = 64 square inches where a 9 x 13 = 117 square inches. If you double the 8 x 8-inch pan it would come out to 128 square inches which is close enough to 117 square inches.
TROUBLESHOOTING
WHY IS IT TAKING LONGER THAN DESCRIBED TO BAKE?
Overtime, the thermostat on ovens gets a little off, causing some ovens to run hot and others to run cool. This is why recipes tend to say things like "10 to 15 minutes or until golden brown."
So, if it takes you longer than expected, that's fine. Just keep baking until ready.
WHY DID MY RECIPE COME OUT TOO DRY?
Just like some ovens run cool, others run hot. If your oven runs hot, bake these at a lower temperature. Ideally, you should get an oven thermometer to know what temperature you're really baking at.
DIY Dairy free brownie mix
Making your own dairy free brownie mix is easy!
Just take all the dry ingredients in this recipe, mix them together well, and put them in a bag, jar, or a container.
When you are ready to make the brownies, pour the dry ingredients into a bowl, add the wet ingredients, and bake as directed.
SNAFU
The first time I made these brownies I didn't line the bottom of the pan with baking paper. I didn't even grease and flour it. Nope, I just gave it a light coat of oil.
Big mistake. These brownies really stick to the bottom and it took tons of effort to cut them and get them out without ruining their shape.
how to store
For a pan of brownies, wrap well in plastic wrap or in an airtight plastic storage bag. Keep at room temperature for up to four days.
For cut brownies, wrap individually with plastic wrap. Store in an air tight container or an airtight plastic bag. Keep at room temperature for one to two days.
how to freeze
Wrap cooled uncut brownies tightly in a plastic wrap. Wrap again in aluminum foil. Freeze for up to 3 months. After 3 months the brownies are still safe to eat but the quality begins to degrade.
Other desserts you may like:
Fudge Brownies with Oil
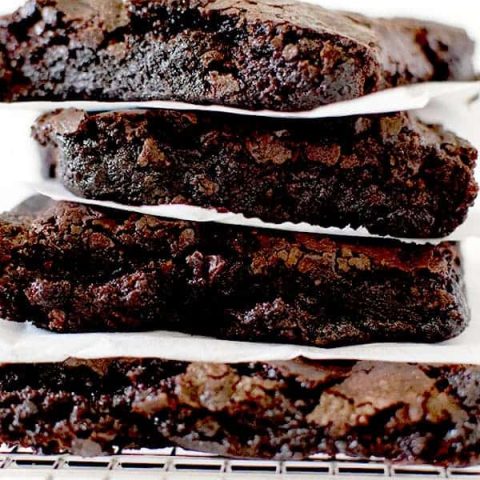
These dairy free fudge brownies made with oil rather than butter are extra fudgy and have a richer chocolate flavor. You can use pretty much any oil you want, including olive oil and coconut oil.
Ingredients
- ½ cup all-purpose flour (65 grams)
- ½ cup unsweetened cocoa powder (50 grams)
- 1 cup white sugar (200 grams)
- ¼ teaspoon salt
- 6 tablespoons oil
- 2 eggs
- 2 teaspoons vanilla
Instructions
- Preheat oven to 350°F or 175°C.
- Whisk together flour, cocoa, sugar, and salt in a mixing bowl.
- Add oil, eggs, and vanilla. Mix until smooth.
- Using a baking spatula, pour batter into a 8×8 baking pan lined with parchment paper.
- Bake for 20-25 minutes, or until the center of the brownies is firm to the touch.
- Remove and let cool to room temperature. Chill before cutting for greater ease.
Recommended Products
Some of the links below are affiliate links, which means that if you choose to make a purchase, I will earn a small commission. This commission comes at no additional cost to you.
Nutrition Information:
Yield:
9Serving Size:
1Amount Per Serving: Calories: 231Total Fat: 11gSaturated Fat: 1gTrans Fat: 0gUnsaturated Fat: 9gCholesterol: 41mgSodium: 75mgCarbohydrates: 30gFiber: 1gSugar: 22gProtein: 3g
Why is the batter so stiff? I had to add a couple tbls of water just so I could spread it..
Usually when batter is too dry or too stiff it's because a liquid ingredient was forgotten to be added or not as much as instructed was used.
I made these brownies, today. I wanted to use up my coconut oil; but I was short a few ounces. I ADDED 1/4 tso. Baking sosaI added olive oil and it worked perfectly. I doubled the recipe for an 8x13 inches pan.I had to cook 35 minutes.
I am at 3500 ft. above sea level. They turned out amazing.
I'm glad to hear it! 😀
I just made these exactly like the recipe, and it looks the same inside but is grainy, and the top is not crackly or crunchy at all, and I did not overbake (or underbake as the edges were fully set and the middle had some give but was done). Do you have an idea what happened?
Did you have any drips or crumbs or burnt bits on the bottom of your oven? That can cause recipes to come out strange.
Hi! I need to make them without oil, as I need to lower the fat content. If I use applesauce, what other changes would you make to keep the recipe as close to the original as possible? If you suggest substituting oil with something other than applesauce, please let me know as well as to what other changes in the original recipe I should make to preserve the flavor and consistency. Thanks!
I think unsweetened apple sauce is your best bet to lower the fat content while having a minimal impact on the recipe itself.
These are easy and delicious. I reduced sugar a bit and added chopped crystallised ginger and chopped macadamias.
I'm glad you enjoyed them 🙂