This cast iron cornbread is your classic Southern styled skillet cornbread with a perfect crust, but extra moist. Serve as a side dish.
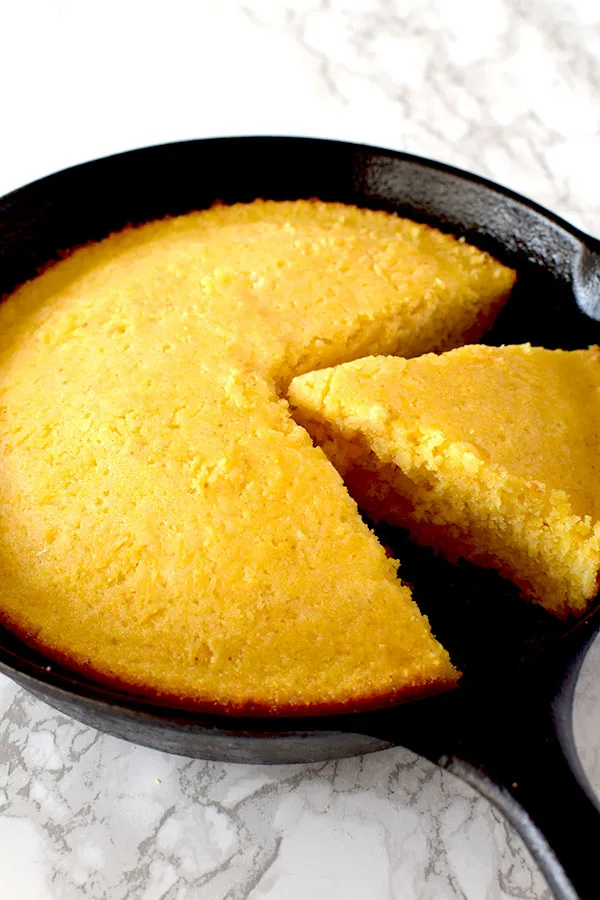
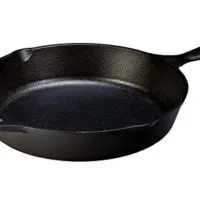
This cast iron cornbread is baked in a cast iron skillet. This is common practice in the South.
Southern cornbread is more savory than sweet cornbread, which is popular in the North.
This type of cornbread is usually eaten as a side dish and goes perfectly with fried chicken.
HOW TO EAT Cornbread
According to my friend from the great state of Georgia, “cornbread can be eaten with many things. Usually things like fried chicken, almost any veggie, barbecue, and so on”
He also said it can be topped with honey, jalapenos, or cheese.
A woman from Kentucky once told me: when she was a little girl, she would have her cornbread for dinner with a glass of milk and put cornbread crumbs in the milk.
Cornbread is generally served as a side dish. However, cornbread topped with honey can also be eaten as a dessert.
How is cast iron effective for cornbread?
Cast iron is particularly effective because it heats up and retains heat well, ensuring even cooking.
QUICK BREADS VS YEAST BREADS
Yeast breads are breads made using yeast, such as white bread and dinner rolls. Basically, it's what you think of when you hear the word "bread".
Quick breads, which originated in the United States, are breads that are leavened with baking soda or baking powder instead of yeast. This allows them to be prepared quickly in comparison to the time it takes to make breads made with yeast.
Irish soda bread and biscuits are two examples of quick breads.
However, banana bread, cornbread, and pumpkin bread are also quick breads, even though they seem more like somewhat dense cakes.
Even more surprisingly, muffins, like blueberry muffins and banana muffins, are also a type of quick bread.
THE DIFFERENCE BETWEEN QUICK BREAD AND CAKE
Quick breads are denser than cake and usually require less sugar.
FLOUR Used For Quick Bread
Even though "bread" is in the name, quick breads should not be made with bread flour.
Bread flour has a higher protein content than all-purpose, which helps with gluten development. This creates a chewy texture and a heavier, denser bread.
These are not qualities you want from your quick bread.
You could use cake flour, but generally, all-purpose flour is used.
BREAD FLOUR VS ALL-PURPOSE FLOUR
Bread flour has a higher protein content than all-purpose, which helps with gluten development.
This creates a chewy texture and heavier and denser bread. This can be great in recipes like bread bowls. However, it is less desirable in breads like challah bread, which you want to be light and fluffy.
All-purpose flour has a lower protein content, but can generally be substituted for bread flour.
Can I use whole wheat flour instead?
Generally, if you want to use whole wheat flour in bread, it's recommended to replace up to half of the all-purpose flour called for with whole wheat flour.
HOW TO MEASURE FLOUR AND OTHER DRY INGREDIENTS
The best way to measure dry ingredients is with a scale. However, this is not commonly done in the United States, where dry measuring cups are used instead.
To measure most dry ingredients, first spoon them into a dry measuring cup and then level off the measuring cup with an upside-down butter knife.
Make sure not to pack it down because it can lead to using more of the ingredient than called for.
The exception is brown sugar. To measure brown sugar, pack it into the measuring cup and then level off any excess.
To measure chocolate chips, nuts, or dried fruit, just pour them in and then level them off.
DRY VS LIQUID MEASURING CUP
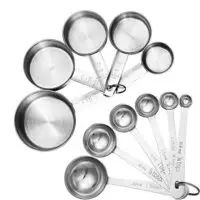
Dry measuring cups are a set of cups that often come with measuring spoons. Each cup is a different measurement just like each spoon is a different measurement.
Liquid measuring cups, on the other hand, are cups that have measuring lines on the side to mark the measurements.
The problem with using liquid measuring cups to measure dry ingredients (like flour and cocoa) is that they are powders. So, as you shake the cup to level them off, the powders settle and you end up with more than you need.
I tested this with a friend who didn't believe me and we ended up with a number of tablespoons more than the recipe called for.
WHY sift Powdery Ingredients
There are a number of benefits to sifting powdery ingredients like flour and cocoa.
First of all, flour is often sifted before use to aerate it and remove any lumps. This helps in achieving a lighter texture in baked goods.
Secondly, if you measure flour that's just been sifted, you can get a more accurate measurement than from flour that's been packed tightly in a bag.
In addition, sifting dry ingredients together, such as flour, cocoa, and baking powder, helps make sure they're evenly dispersed.
BAKING WITH OIL
Baking with oil produces a moister and tenderer texture compared to that of baked goods made with butter.
Cakes, cupcakes, muffins, and quick breads also tend to bake up taller with a better crumb and stay moist and tender much longer than recipes made with butter.
Also, since oil weighs less than butter, baked goods made with oil have a lighter texture than those made with butter.
In addition, butter is usually only 80% fat, whereas oil is 100% fat. As a result, the water that's present in butter strengthens the gluten in the flour, making it more dense and less tender than baked goods made with oil.
Oil is often used in recipes where a lighter and airier texture is desired or in recipes that call for both oil and butter, in order to have the benefits of oil while keeping the butter flavor.
Which Type Of Oil to Use
I use neutral oils like canola oil, safflower oil, and vegetable oil. You can also use stronger oils like olive oil and coconut oil, but they may change the taste somewhat.
Is it better to use canola oil or olive oil?
Canola oil is relatively cheap and, due to its lack of flavor and high smoke point, is very versatile.
Olive oil, on the other hand, is healthier. Also, its stronger flavor makes it preferable in recipes such as focaccia, which require its distinct taste.
Baking with Oil Conversion Chart
If you want to convert your butter recipes to oil recipes, take a look at my baking with oil - butter to oil conversion chart.
How to store Oil
Store oils in a cool, dark place to prevent them from becoming rancid.
If refrigerated, some oils, like olive oil, may solidify, but will return to a liquid state at room temperature.
Coconut oil begins to solidify in temperatures under 76ºF or 25ºC.
DO EGGS NEED TO BE AT ROOM TEMPERATURE?
The short answer is "no." While a side-by-side comparison shows that baking with eggs at room temperature makes a better crumb, it’s not otherwise noticeable.
What are Eggs used for?
Eggs do three things in most recipes: they help bind the ingredients together, act as a mild leavening agent, and they add moisture.
ARE EGGS DAIRY?
No, eggs are not dairy. Dairy is milk and any food products made from milk, including cheese, cream, butter, and yogurt.
So, while eggs are an animal product, they are not dairy. In fact, eggs fall under the protein food group.
How to tell if your eggs are still good
Fill a glass with cool water and submerge the eggs.
If the eggs sink to the bottom and lay flat on their side, they're still fresh.
If they sink, but stand on one end at the bottom of the glass, the eggs are not as fresh but still good.
An egg that floats to the top is likely spoiled.
EGGLESS OPTION
Eggs can be substituted with ¼ cup of unsweetened apple sauce per egg. This means that for recipes calling for 2 eggs, you’d need ½ cup of unsweetened apple sauce.
The reason applesauce makes a good binder is that it's high in pectin. Pectin is a naturally occurring starch in fruits and berries that acts as a thickening agent and stabilizer in food.
This happens when combined with sugar and acid (if the fruit or berry isn't naturally acidic).
Just keep in mind that it may change the flavor slightly.
BAKING SODA VS BAKING POWDER
Both baking soda and baking powder are leavening agents, which means that they help baked goods rise. However, they're not the same thing and they are not interchangeable.
Using baking soda instead of baking powder can give your recipe a terrible metallic taste, while using baking powder instead of baking soda leaves your baked goods looking flat.
BAKING SODA
When baking soda (also known as sodium bicarbonate) is combined with acidic ingredients and exposed to heat, it causes batter or dough rise and contributes to their light and fluffy texture.
However, baking soda is a versatile ingredient. It can be sprinkled over meat to tenderize it and it can be added to tomato sauce to neutralize the acidity.
Baking soda, when combined with an acid - such as cream of tartar, lemon juice, buttermilk, cocoa, and vinegar - creates carbon dioxide. When the carbon dioxide is released, it causes the familiar texture and crumb in pancakes, cakes, quick breads, soda bread, and other baked and fried foods.
A good rule of thumb is to use around ¼ teaspoon of baking soda per 1 cup of flour.
BAKING POWDER
Baking powder is created by combining baking soda, cream of tartar, and sometimes cornstarch.
Since baking powder already contains an acid, it's most often used when a recipe does not call for an additional acidic ingredient or calls for too little of one.
There are two types of baking powder. Single-acting baking powder and double-acting baking power.
Single-acting baking powder gets activated only once - when it gets wet.
Most baking powder sold is double-acting. This means that the leavening occurs in two steps.
The first is when the baking powder gets wet, which is why you cannot prepare some batters ahead of time to bake later. The second step is when the baking powder is exposed to heat, which happens when the batter is baked or fried.
A good rule of thumb is to use around 1 teaspoon of baking powder per 1 cup of flour.
WHY SOME RECIPES CALL FOR BOTH
Some recipes use both baking soda and baking powder because they need extra leavening that the baking soda alone cannot provide.
In these cases, baking soda provides an initial lift, while baking powder provides additional rise.
WHICH ONE IS STRONGER?
You may have already guessed the answer since baking soda is used to make baking powder and you need more baking powder per cup of flour. But I’ll tell you anyway.
Baking soda is four times stronger than baking powder.
That's why you will, more often than not, see recipes that only call for baking soda rather than recipes that only call for baking powder.
HOW LONG DO THEY LAST?
BAKING SODA
Baking soda is good indefinitely past its best by date, although it can lose potency over time.
A good rule of thumb is two years for an unopened package and six months for an opened package.
However, to be honest, I’ve used very old baking soda with good results.
BAKING POWDER
Like baking soda, baking powder is good indefinitely past its best by date, and can lose its potency over time.
For both opened and unopened, it’s ideal to use it within nine months to a year.
While storing it, make sure to keep it in a dry place and away from humidity.
HOW TO TEST IF IT’S STILL GOOD
BAKING POWDER
To test baking powder, pour 3 tablespoons of warm water into a small bowl, add ½ teaspoon of baking powder, and stir.
If the baking powder is good to use, it should fizz a little.
BAKING SODA
To test baking soda, pour 3 tablespoons of white distilled vinegar into a small bowl, add ½ teaspoon of baking soda, and stir.
The mixture should rapidly bubble if the soda is fresh.
GLUTEN FREE OPTION
Gluten Free Flour
Substitute all-purpose gluten-free flour in place of all-purpose regular flour cup for cup.
BUCKWHEAT FLOUR
Buckwheat flour is easy to find compared to most other gluten-free flours, and it adds a nice earthy nutty taste.
The downside is that it has a distinct flavor, so the change will be noticeable.
It’s also darker, so the color won’t be the same. Substitute cup for cup.
RICE FLOUR
Rice flour can also be used and can be found in most Asian and health food stores.
White rice flour has a mild flavor and doesn’t change the color of the muffin or quick bread.
Since it doesn’t have much flavor, it's best to use it with ingredients that do. Substitute cup for cup.
OAT FLOUR
Oat flour is made from whole oats that have been ground into a powder, which can easily be done at home.
It gives more flavor and a chewier and crumblier texture than regular all-purpose flour.
Substitute 1 cup of all-purpose flour for 1 ⅓ cup oat flour. To make 1 cup of oat flour, blend 1 ¼ cups of oats in a food processor until finely ground.
Note: oats must be marked gluten-free because they can get cross-contaminated in the factory.
BAKING AT HIGH ALTITUDES
The higher the altitude, the lower the air pressure and the more difficult it is to bake recipes.
Increase by 15 to 25°F or 8 to 14°C. Since leavening and evaporation happen more quickly, the higher temperature helps set the structure of baked goods before they over-expand and dry out.
However, baking at higher temperatures means products are done sooner, so decrease by 5-8 minutes per 30 minutes of baking time.
Adjustment for 3000 feet
- Reduce baking powder: for each teaspoon, decrease ⅛ teaspoon.
- Reduce sugar: for each cup, decrease 0 to 1 tablespoon.
- Increase liquid: for each cup, add 1 to 2 tablespoons.
Adjustment for 5000 feet
- Reduce baking powder: for each teaspoon, decrease ⅛ to ¼ teaspoon.
- Reduce sugar: for each cup, decrease 0 to 2 tablespoons.
- Increase liquid: for each cup, add 2 to 4 tablespoons.
Adjustment for 7000+ feet
- Reduce baking powder: for each teaspoon, decrease ¼ teaspoon.
- Reduce sugar: for each cup, decrease 1 to 3 tablespoons.
- Increase liquid: for each cup, add 3 to 4 tablespoons.
Baking with Humidity
Humidity can have a big impact on how your baked goods come out.
This is because when humidity is extremely high (think 70 percent or more), baking ingredients like flour, sugar, salt, baking powder, and baking soda soak up moisture from the air.
This can negatively impact the outcome of your cakes, cookies, yeast breads, and quick breads.
There are some things you can do to try to save your baking.
Try to counterbalance the additional moisture
To help counterbalance the additional moisture your dry ingredients soak up from the air, try reducing the amount of liquid in the recipe by about one quarter.
If the batter or dough looks too dry once all the ingredients are mixed together, add additional liquid a tablespoon at a time until you have the desired consistency.
This is not usually possible to do for cookies, but it does work for cakes and breads.
Store Ingredients in the Fridge
If flour and sugar are stored in the refrigerator or freezer rather than in a cupboard or pantry, they are better protected from humidity.
As an added benefit, keeping these ingredients cool also helps keep them fresher longer, in addition to helping them stay bug-free.
For the best results, let them warm to room temperature before using.
Bake for Longer
If you bake your goodies for a few extra minutes, it can help the liquid to cook off.
To avoid overbaking, continue testing for doneness every couple of minutes for breads, quick breads, cakes, cupcakes, and muffins. Cookies, on the other hand, need to be checked every minute.
Use Air Conditioning
To help lower humidity levels on humid summer days, air condition the room for at least an hour before you start baking.
Cooler air isn’t able to hold as much moisture as warm air.
Store your baked goods in an airtight container
Humidity can also ruin your fresh-baked goods because when they are left out, they can absorb moisture.
To avoid this, store them in an airtight container or resealable bag.
HOW TO STORE
Let the bread cool fully. Transfer the bread to an airtight container lined with a paper towel. Place another paper towel on top of the bread before sealing.
If using a zip-top plastic bag, line both sides of the bag with paper towels and remove as much air as possible before sealing the top of the bag.
Store at room temperature for up to 4 days.
HOW TO FREEZE
Let the bread cool fully.
Wrap in plastic wrap, then place in a resealable freezer bag. Freeze for up to 3 months.
They will still be safe to eat after 2 to 3 months but their quality begins to degrade.
When ready to eat, let thaw at room temperature or rewarm gently in an oven.
CORNBREAD SNAFU:
The first time I tried to make this recipe was for Thanksgiving Dinner.
I was feeling so rushed, I accidentally added a tablespoon of salt instead of a teaspoon.
Needless to say, it was extremely salty and not much of a hit.
In fact, I was worried my family wouldn’t give this recipe a second chance.
However, after a little convincing, they are glad they did.
Cast Iron Cornbread
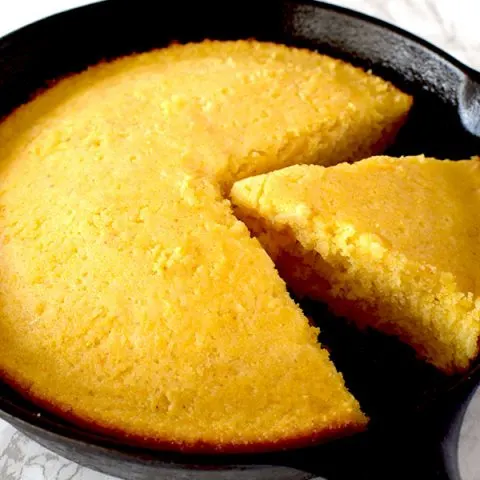
Cast iron cornbread is Southern style savory cornbread. Serve as a side dish.
Ingredients
- 1 cup cornmeal (150 grams)
- 1 cup all-purpose flour (130 grams)
- ¼ white sugar (50 grams)
- 1 tablespoon baking powder
- 1 teaspoon salt
- 1 cup water (235 millilitres)
- 1 egg, beaten
- ⅓ cup oil* (80 millilitres)
Instructions
- Preheat the oven to 400°F or 205°C.
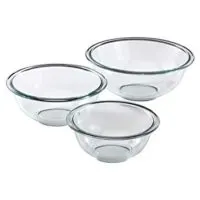
- Whisk together the cornmeal, flour, sugar, baking powder, and salt in a mixing bowl.
- Add water, egg, and oil. Mix until well incorporated.
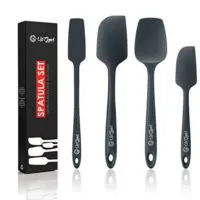
- Using a baking spatula, pour into a 10-inch cast iron skillet.
- Bake for 15 to 20 minutes or until a toothpick inserted into the center comes out clean. Let cool before cutting.
Recommended Products
Some of the links below are affiliate links, which means that if you choose to make a purchase, I will earn a small commission. This commission comes at no additional cost to you.
Nutrition Information:
Yield:
9Serving Size:
1Amount Per Serving: Calories: 188Total Fat: 10gSaturated Fat: 1gTrans Fat: 0gUnsaturated Fat: 8gCholesterol: 21mgSodium: 413mgCarbohydrates: 22gFiber: 1gSugar: 1gProtein: 3g
