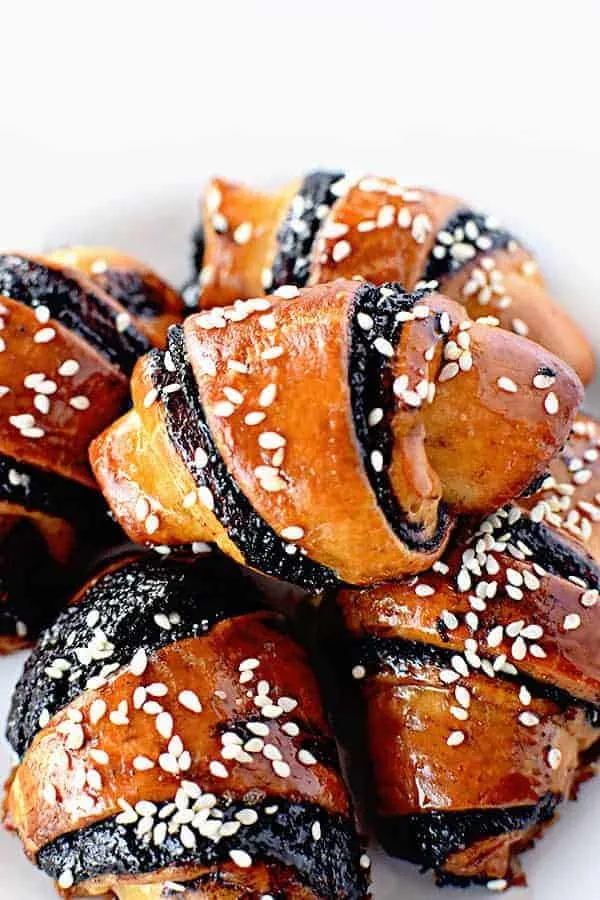
There are few Israeli desserts as loved as chocolate rugelach. They are sweet, have an incredible chocolate filling, and are made beautiful by a sprinkling of sesame seeds.
Best of all, these chocolate rugelach are dairy free! It is made without butter and cream cheese.
One of my favorite memories is the time my mother, my brother Aaron, and I went to the Machene Yehudah Market in Jerusalem just as it was opening.
Shopkeepers had just finished putting their goods out and the aromas of fresh baked bread and goodies filled the air.
It is our custom that whenever we go to the market we buy nuts and pickled vegetables and nibble on them while strolling around.
This time though, before we could buy anything, we came across a stall that had fresh baked rugelach that were just being taken out of the oven. The smell was intoxicating.
As the baker placed them on the counter, we saw that they were smothered in simple syrup and sitting in a bath of chocolate that leaked out of them.
Needless to say, we got some right away!
They were gooey, sweet, and rich in deep chocolate.
Israeli rugelach differ from other types in a number of ways.
For one thing, they are always really soft and often gooey, are almost always filled with chocolate, and are usually sprinkled with sesame seeds.
Also, I’ve never seen any made with cream cheese and are usually dairy free.
While I don't have a recipe for the gooey ones yet, this recipe is for soft ones, but trust me, you wont be disappointed.
Other recipes you may like are my chocolate babka and chocolate rugelach cake.
You should also check out my Israeli recipes and dairy free desserts.
BREAD FLOUR VS ALL-PURPOSE FLOUR
Bread flour has a higher protein content than all-purpose, which helps with gluten development.
This creates a chewy texture and heavier and denser bread. This can be great in recipes like bread bowls. However, it is less desirable in breads like challah bread, which you want to be light and fluffy.
All-purpose flour has a lower protein content, but can generally be substituted for bread flour.
Can I use whole wheat flour instead?
Generally, if you want to use whole wheat flour in bread, it's recommended to replace up to half of the all-purpose flour called for with whole wheat flour.
HOW TO MEASURE FLOUR AND OTHER DRY INGREDIENTS
The best way to measure dry ingredients is with a scale. However, this is not commonly done in the United States, where dry measuring cups are used instead.
To measure most dry ingredients, first spoon them into a dry measuring cup and then level off the measuring cup with an upside-down butter knife.
Make sure not to pack it down because it can lead to using more of the ingredient than called for.
The exception is brown sugar. To measure brown sugar, pack it into the measuring cup and then level off any excess.
To measure chocolate chips, nuts, or dried fruit, just pour them in and then level them off.
DRY VS LIQUID MEASURING CUP
Dry measuring cups are a set of cups that often come with measuring spoons. Each cup is a different measurement just like each spoon is a different measurement.
Liquid measuring cups, on the other hand, are cups that have measuring lines on the side to mark the measurements.
The problem with using liquid measuring cups to measure dry ingredients (like flour and cocoa) is that they are powders. So, as you shake the cup to level them off, the powders settle and you end up with more than you need.
I tested this with a friend who didn't believe me and we ended up with a number of tablespoons more than the recipe called for.
WHY sift Powdery Ingredients
There are a number of benefits to sifting powdery ingredients like flour and cocoa.
First of all, flour is often sifted before use to aerate it and remove any lumps. This helps in achieving a lighter texture in baked goods.
Secondly, if you measure flour that's just been sifted, you can get a more accurate measurement than from flour that's been packed tightly in a bag.
In addition, sifting dry ingredients together, such as flour, cocoa, and baking powder, helps make sure they're evenly dispersed.
Yeast
Yeast is used in bread and other baked goods to create a light and airy texture.
It does this by fermenting sugars, which causes dough to rise.
In most cases, the yeast is dormant until activated or "bloomed" by being rehydrated and woken up. Usually, this is done with warm liquid and a small amount of sugar.
Once activated, it begins the proofing process.
"Proofing" is the fermentation process where yeast eats the sugar and forms bubbles, indicating that it's alive and ready to leaven the dough.
Types of YEAST
There are seven different types of yeast used for baking. However, only five are relevant to home bakers, and just about all my recipes only use instant yeast.
WILD YEAST
Wild yeast is found naturally in the air. This type of yeast is used for sourdough breads, and in order to use it, you need to make a sourdough starter.
FRESH YEAST
Fresh yeast, cake yeast, block yeast, wet yeast, or compressed yeast, is found in small, foil-wrapped cubes.
It is far less popular with home bakers because it’s highly perishable. However, it is still widely available for commercial use and is still used by home bakers in some countries.
The benefits of using it is that it’s easier to measure and has the most leavening power.
If you want to use fresh yeast in this recipe, then for every 1 teaspoon of instant dry yeast, you'd need 17 grams (or 0.6 ounces) of fresh yeast.
Make sure to bloom it before using it in this recipe.
ACTIVE DRY YEAST
Active dry yeast looks like large-grained powder, mainly used by home bakers in the United States.
It has a much longer lifespan than compressed yeast, lasting up to a year at room temperature and more than a decade if frozen.
The main downside of using this is that a lot of the yeast is already dead, so you need more of it than other yeasts. This can cause an undesired yeast flavor.
If you want to use active dry yeast in this recipe, then for 1 teaspoon of instant dry yeast, you need 1 ¼ teaspoons of active dry yeast.
Make sure to bloom it first before using it in this recipe.
INSTANT YEAST
Instant yeast looks the same as active dry yeast. However, it does not need to be proofed before using.
Instead of having to be activated in warm liquid first, it can be added as is when making the dough.
It is more perishable than active dry yeast, lasting only 2 to 4 months at room temperature, but lasts for years if kept in the freezer.
This is my favorite type of yeast to use because it lasts longer than fresh yeast, and you need less of it than active dry yeast.
RAPID-RISE YEAST
Rapid-rise yeast is often specifically marketed toward users of bread machines. It’s essentially instant yeast with a smaller grain. The smaller granules allow it to dissolve faster in the dough and therefore rise faster.
While most baking experts believe that the bread flavors aren’t as developed by using this yeast, others feel it makes little difference.
Activating Yeast
The purpose of activating yeast is to make sure that the yeast cells are alive. This is a necessary step for most types of yeast.
To activate the yeast, mix the yeast with warm liquid (usually around 110°F or 43°C) and a small amount of sugar. The sugar provides a food source for the yeast. After a few minutes, the mixture should become frothy, indicating that the yeast is active and ready for use.
WHY ACTIVATE OR BLOOM INSTANT YEAST?
"Activating" and "blooming" yeast are different terms for the same process.
While instant yeast does not actually need to be bloomed, I do it anyway because it helps troubleshoot if any problems come up.
By blooming the yeast first, you know it is active. So, if the dough has trouble rising, you know it’s not the yeast.
This is particularly useful when you don’t have a “warm” place to let it rise.
While the sugar content may matter for most types of yeast, it doesn't seem to make a difference for instant yeast.
When I activate instant yeast, I usually mix all the liquid, sugar, and yeast together in the bowl. Once it froths up, I add the rest of the liquid ingredients followed by the rest of the dry ingredents.
How to Bloom Yeast
To bloom, place the yeast, lukewarm water, and sugar together in the bowl. Stir and wait for it to activate.
The water must be warm because hot water will kill the yeast and cool water won't activate it.
If you are using fresh yeast, make sure to break it up with a fork once it is in the water.
You know the yeast is activated when foam appears on the surface. This can take up to 10 minutes.
Storing Yeast
Once opened, store in an airtight container and keep in a cool, dry place.
If you keep the yeast in the freezer, it will stay good for years.
HOW LONG DOES IT TAKE DOUGH TO RISE?
How quickly dough rises depends on how warm the environment it is rising in is.
If you put it in the fridge for instance, it could take 8 hours or so. If you leave it on the counter in a comfortably warm room, it's usually 45 minutes to 1 hour.
However, sometimes dough can take up to 2 hours to rise depending on a variety of factors.
HOW TO RISE BREAD FASTER
To speed up the rising process, you can preheat the oven to its lowest temperature and turn it off.
Then, cover the dough with a damp towel and place it in the oven.
This trick works for me every time. On occasion, I may need to remove the dough and preheat the oven another time or two, but usually just once does the trick.
Some bakers feel it doesn’t allow flavors to really develop. Personally, I've never noticed much of a difference.
PUNCHING DOUGH DOWN
"Punching" is a bit of a strong word. Yeast is a delicate living thing, so you actually need to treat it with care.
What you’re really doing is lightly pressing down the dough through the center with your fist. This removes gases that have formed during the first rise.
By doing this, you are also bringing the yeast, sugar, and moisture back together, which is important for the second rise as the yeast feeds on the sugar.
After you “punch” down the dough, you should pull the edges of the dough to the center. Then, take the dough out of the bowl and place it on a lightly floured board. Next, scrape out the remaining dough from the bowl using a rubber spatula.
Lastly, shape your dough into a ball, and if desired, you can knead the dough two or three times to release additional air bubbles.
I like kneading my dough a few times by hand after the mixer has done most of the work. This creates an extra smooth crust.
THE SECOND RISE
The second rise allows the yeast to feed longer on the sugar. This allows the bread to become larger, have a better crumb, and develop a better flavor.
Also, if you were to let it rise only once, punch it down, shape it, and stick it in the oven, your bread would rise somewhat, but not enough for it to become fluffy.
Overproofing Dough
Letting the dough rise is known as "proofing the dough." Overproofing is when you let the dough rise too much.
If you let your dough rise too much, it will seem big and beautiful at first, and then it will fall and become dense after it's removed from the oven.
If you've found that you left the dough to rise to much larger than double its original size, punch it down, reshape it, and then let it rise to its proper size.
How long can I keep dough in the refrigerator?
You can refrigerate dough for up to 2-3 days. After that, the yeast may lose potency.
Keep in mind, the dough will continue to rise slowly during that time.
Can I freeze unbaked dough for later use?
You can freeze dough in airtight freezer container for up to four weeks.
When you're ready to use it, first thaw the dough in the refrigerator overnight.
It will take up to twice as long for the dough to rise as it would if it hadn’t been frozen.
Why did my dough turn out dense and heavy?
This can be due to overkneading, not letting it rise completely, overproofing, or using too much flour.
Baking with Humidity
Humidity can have a big impact on how your baked goods come out.
This is because when humidity is extremely high (think 70 percent or more), baking ingredients like flour, sugar, salt, baking powder, and baking soda soak up moisture from the air.
This can negatively impact the outcome of your cakes, cookies, yeast breads, and quick breads.
There are some things you can do to try to save your baking.
Try to counterbalance the additional moisture
To help counterbalance the additional moisture your dry ingredients soak up from the air, try reducing the amount of liquid in the recipe by about one quarter.
If the batter or dough looks too dry once all the ingredients are mixed together, add additional liquid a tablespoon at a time until you have the desired consistency.
This is not usually possible to do for cookies, but it does work for cakes and breads.
Store Ingredients in the Fridge
If flour and sugar are stored in the refrigerator or freezer rather than in a cupboard or pantry, they are better protected from humidity.
As an added benefit, keeping these ingredients cool also helps keep them fresher longer, in addition to helping them stay bug-free.
For the best results, let them warm to room temperature before using.
Bake for Longer
If you bake your goodies for a few extra minutes, it can help the liquid to cook off.
To avoid overbaking, continue testing for doneness every couple of minutes for breads, quick breads, cakes, cupcakes, and muffins. Cookies, on the other hand, need to be checked every minute.
Use Air Conditioning
To help lower humidity levels on humid summer days, air condition the room for at least an hour before you start baking.
Cooler air isn’t able to hold as much moisture as warm air.
Store your baked goods in an airtight container
Humidity can also ruin your fresh-baked goods because when they are left out, they can absorb moisture.
To avoid this, store them in an airtight container or resealable bag.
BAKING WITH OIL
Baking with oil produces a moister and tenderer texture compared to that of baked goods made with butter.
Cakes, cupcakes, muffins, and quick breads also tend to bake up taller with a better crumb and stay moist and tender much longer than recipes made with butter.
Also, since oil weighs less than butter, baked goods made with oil have a lighter texture than those made with butter.
In addition, butter is usually only 80% fat, whereas oil is 100% fat. As a result, the water that's present in butter strengthens the gluten in the flour, making it more dense and less tender than baked goods made with oil.
Oil is often used in recipes where a lighter and airier texture is desired or in recipes that call for both oil and butter, in order to have the benefits of oil while keeping the butter flavor.
Which Type Of Oil to Use
I use neutral oils like canola oil, safflower oil, and vegetable oil. You can also use stronger oils like olive oil and coconut oil, but they may change the taste somewhat.
Is it better to use canola oil or olive oil?
Canola oil is relatively cheap and, due to its lack of flavor and high smoke point, is very versatile.
Olive oil, on the other hand, is healthier. Also, its stronger flavor makes it preferable in recipes such as focaccia, which require its distinct taste.
Baking with Oil Conversion Chart
If you want to convert your butter recipes to oil recipes, take a look at my baking with oil - butter to oil conversion chart.
How to store Oil
Store oils in a cool, dark place to prevent them from becoming rancid.
If refrigerated, some oils, like olive oil, may solidify, but will return to a liquid state at room temperature.
Coconut oil begins to solidify in temperatures under 76ºF or 25ºC.
Sugar
The primary role of sugar is to be a sweetener. However, sugar also contributes to the tenderness and moistness of the baked good by absorbing and retaining moisture and helps create the golden brown color when baking as it caramelizes.
Recipes with more sugar often result in softer, moister textures. However, I learned the hard way that too much sugar leads to a sticky mess.
When it's heated, sugar caramelizes, resulting in a rich, complex flavor and a brown color. This adds both flavor and color to baked goods and is also the process in which caramel sauce, dulce de leche, caramel candies, and regular candies are made.
When used in recipes containing yeast, the sugar is eaten by the yeast, producing carbon dioxide and causing the dough to rise.
Sugar also acts as a preservative in jams, jellies, and fruit preserves by reducing water activity and preventing microbial growth.
There are many different types of sugar, including white sugar, brown sugar, vanilla sugar, powdered sugar, turbinado sugar, and demerara sugar.
When a recipe calls for “sugar” without specifying anything else, it's referring to regular white sugar.
White Sugar
White sugar (sometimes called granulated sugar, table sugar, or white granulated sugar) is made of either beet sugar or cane sugar, which has undergone a refining process.
It is the easiest to find and most commonly used.
Brown Sugar
Brown sugar is white sugar with molasses added to it.
It is commonly used in chocolate chip cookie recipes, and it’s rare for a recipe that calls for brown sugar not to also call for white sugar as well.
When a recipe calls for “brown sugar” but doesn’t specify what type (light or dark), it is referring to light brown sugar.
In my recipes, you can use whatever type of brown sugar you have on hand, whether it is dark brown sugar, light brown sugar, or demerara sugar - which is very common in Israel.
Just keep in mind that the flavor and color will be slightly different, depending on what you choose to use.
Turbinado Sugar
Turbinado sugar is better known as "raw sugar." But, despite this name, the sugar is not really “raw.”
Instead, it's partially refined sugar that retains some of the original molasses.
The term "raw sugar" may also give off the impression that it is somehow healthier.
In reality, turbinado sugar is nutritionally similar to white sugar.
Demerara Sugar
Demerara sugar is very popular in Israel and is especially delicious in tea, but is also used for baking.
Unlike white sugar, demerara sugar undergoes minimal processing and retains some vitamins and minerals.
However, it is still not much healthier than white sugar.
Vanilla Sugar
Vanilla sugar is not very common in the States. However, it is common in Israel and parts of Europe.
This is sugar that sat for an extended period of time with vanilla beans, giving it a vanilla flavor.
Caster Sugar
This type of sugar is common in the United Kingdom.
It has a grain finer than white (granulated) sugar and larger than powdered sugar.
Caster sugar is often called for in recipes for delicate baked goods like meringues, souffles, and sponge cakes.
You can use a 1:1 conversion rate between caster sugar and white (granulated) sugar.
Powdered sugar
Powdered sugar, sometimes known as confectioners’ sugar, is a sugar with a powdered texture.
This sugar is rarely used for baking. Instead, it is used for dusting desserts and making frosting, icing, and glazes.
In some countries, you can also find powdered vanilla sugar.
It is made the exact same way regular vanilla sugar is made. However, the sugar used is powdered instead of granulated.
Vanilla Extract vs Vanilla sugar
In my recipes, I don’t specify what kind of vanilla to use.
The reason for this is that in the States, vanilla extract is exclusively used.
Meanwhile in Israel, along with many European countries, vanilla sugar is common.
In most, if not all recipes, both vanilla extract and vanilla sugar can be used.
In recipes where vanilla sugar can be used instead of extract, you can replace them 1:1.
Replacing Sugar with Honey
If you’d prefer to use honey instead of sugar, you can do so with pretty good results.
Honey can be two or even three times as sweet depending on the honey, so for every 1 cup of sugar, you can use ½ to ⅔ cup honey.
Since honey adds liquid, you need to remove some to balance it out. For every cup of honey, remove a ¼ cup of liquid.
Also, it burns faster than granulated sugar, so you want to lower the baking temperature by 25 F. In addition, check it early and often to avoid burning or overbaking.
How to Store Sugar
Sugar should be stored in an airtight container to prevent clumping and moisture absorption, and kept in a cool, dry place.
Cocoa
Cocoa adds a rich chocolate flavor and a nice brown color to recipes. It also helps balance sweetness in recipes, adds moisture to baked goods, and can be used to decorate food.
It's used to make recipes like brownies, chocolate cake, chocolate sauce, chocolate cookies, chocolate muffins, and chocolate cupcakes. Cocoa can also be found in surprising places like cinnamon babka (just for the purpose of coloring) and savory dishes, such as chili and mole sauces.
The color can vary depending on the type of cocoa used. Natural cocoa powder tends to create a lighter color, while Dutch-processed cocoa results in a darker one.
Cocoa also adds moisture to recipes, giving baked goods a softer and tenderer texture.
Also, when combined with baking soda, cocoa's acidity activates the leavening agent, contributing to the rise and lightness of baked goods.
Furthermore, cocoa is often used for decorative purposes. It is dusted on top of cakes, used as a coating for truffles, sprinkled over whipped cream, and to create a dusted effect for plated desserts.
WHICH TYPE OF COCOA TO USE
When a recipe calls for cocoa, always use unsweetened cocoa powder, unless specified otherwise.
This allows you to have better control of the sweetness of what you’re making.
There are three basic forms of unsweetened cocoa powder: natural cocoa powder, dutch-processed cocoa power, and raw cocoa powder.
NATURAL COCOA POWDER
Natural cocoa powder comes from cocoa beans that are fermented, roasted, processed at a higher heat, and milled into a powder.
It’s bitter with a very strong and concentrated chocolate flavor.
This cocoa powder is acidic and is often used in recipes calling for baking soda because the two react with each other to allow your baked good to rise.
This is most commonly used, and should be used, in recipes that simply say "cocoa powder."
DUTCH-PROCESSED COCOA POWDER
Dutch-processed cocoa powder starts with cocoa beans that have been washed in potassium carbonate, which neutralizes their acidity.
Since Dutch-processed cocoa powder is neutral, it does not react with baking soda.
When baking, Dutch-processed cocoa is often paired with baking powder.
Dutch-processed cocoa powder can also be used in place of natural cocoa powder in recipes that don’t require leavening.
These include sauces, hot cocoa, frostings, ice cream, pudding, etc.
If you only have Dutch-processed cocoa powder on hand, you can substitute it for neutral cocoa powder.
Just make sure to add ⅛ teaspoon of cream of tartar, white vinegar, or lemon juice for every 3 tablespoons of cocoa powder called for in the recipe.
RAW CACAO POWDER
Raw cacao powder is different from natural and Dutch-processed unsweetened cocoa powder.
It's pure powder from the cacao bean and isn't nearly as processed as either natural or Dutch-processed.
Cocoa is processed at high heat, which destroys much of the nutritional benefits of the cacao seed.
Also, cocoa powder is often alkalized during processing to reduce acidity. The result is a product that’s less bitter and more soluble when added to liquids.
Cacao powder, on the other hand, is made of fermented - not roasted - seeds that are processed at low temperatures and then milled into a powder, ensuring that its nutritional benefits and its bitter flavor are preserved.
You can use raw cacao powder in recipes that don’t specify Dutch-processed cocoa powder, however it is best not to try to.
Compared to cocoa powder, cacao powder has a stronger flavor, it is not as absorbent as cocoa powder, and it is more acidic, so it will react differently with baking soda.
Sweetened Cocoa
Sweetened cocoa contains sugar and is suitable as a hot chocolate mix, but not suitable for recipes.
What's the difference between cocoa powder and cacao powder?
Cocoa powder is made by roasting cacao beans and processing them at high heat.
Cacao powder is made by cold-pressing unroasted cacao beans. It's often considered more "raw" and retains more nutrients.
Both can be used interchangeably in recipes.
Can I use Dutch-processed cocoa instead of natural cocoa?
Yes, but it can affect the acidity and leavening in the recipe. Adjustments may be needed for baking powder or baking soda.
To do this, simply add ⅛ teaspoon of cream of tartar, white vinegar, or lemon juice for every 3 tablespoons of cocoa powder called for in the recipe.
Can I use sweetened cocoa mix instead of unsweetened cocoa in baking?
No, because sweetened cocoa mix contains sugar. The added sugar can alter the sweetness and moisture of the recipe.
How to substitute chocolate with cocoa powder in recipes
How you substitute chocolate with cocoa powder depends on the type of chocolate that is called for. Mix the ingredients together in a bowl first before adding them to the rest of the recipe.
Cocoa substitute for sweet baking chocolate
To replace 4 ounces of sweet baking chocolate, use ¼ cup unsweetened cocoa powder plus ⅓ cup sugar and 3 tablespoons oil or shortening.
Cocoa substitute for semisweet and bittersweet baking chocolate
To replace 4 ounces of semisweet and bittersweet chocolate, use ¼ cup unsweetened cocoa powder plus 2 ½ tablespoons sugar and 3 tablespoons oil or shortening.
Cocoa substitute for unsweetened baking chocolate
To replace 4 ounces of unsweetened chocolate, use ¼ cup unsweetened cocoa powder plus and 3 tablespoons oil or shortening.
How do I prevent lumps when using cocoa in recipes?
Sift the cocoa into the bowl to remove lumps.
How to Store Cocoa
Store cocoa in an airtight container and keep in a cool, dark place to prevent moisture absorption and maintain flavor.
DO EGGS NEED TO BE AT ROOM TEMPERATURE?
The short answer is "no." While a side-by-side comparison shows that baking with eggs at room temperature makes a better crumb, it’s not otherwise noticeable.
What are Eggs used for?
Eggs do three things in most recipes: they help bind the ingredients together, act as a mild leavening agent, and they add moisture.
ARE EGGS DAIRY?
No, eggs are not dairy. Dairy is milk and any food products made from milk, including cheese, cream, butter, and yogurt.
So, while eggs are an animal product, they are not dairy. In fact, eggs fall under the protein food group.
How to tell if your eggs are still good
Fill a glass with cool water and submerge the eggs.
If the eggs sink to the bottom and lay flat on their side, they're still fresh.
If they sink, but stand on one end at the bottom of the glass, the eggs are not as fresh but still good.
An egg that floats to the top is likely spoiled.
EGGLESS OPTION
Eggs can be substituted with ¼ cup of unsweetened apple sauce per egg. This means that for recipes calling for 2 eggs, you’d need ½ cup of unsweetened apple sauce.
The reason applesauce makes a good binder is that it's high in pectin. Pectin is a naturally occurring starch in fruits and berries that acts as a thickening agent and stabilizer in food.
This happens when combined with sugar and acid (if the fruit or berry isn't naturally acidic).
Just keep in mind that it may change the flavor slightly.
Adjusting for a Convection Oven
Convection ovens blow the hot air around, producing around 25 to 30 percent more heat.
Since convection ovens produce more heat, you need either lowering the temperature or shortening the cooking time to compensate.
When recipes specify temperatures and cooking times, it’s for conventional ovens, unless specified otherwise.
A simple rule to follow is to lower the temperature by 25ºF or 14ºC when baking cookies and pies, and 50ºF or 28ºC when roasting meat and poultry. Some convection ovens offer separate settings for baking and for roasting.
You can also leave the temperature the same and instead, shorten the cooking time by 25 percent. For example, if your recipe calls for 60 minutes in the oven, check the food after 45 minutes instead.
However, keep in mind, some convection ovens actually make a heat adjustment for you. That is, if you set a convection oven for 350ºF, it might actually set itself to 325ºF to compensate. So, check your manual before making adjustments.
TROUBLESHOOTING
WHY IS IT TAKING LONGER THAN DESCRIBED TO BAKE?
Over time, the thermostat on ovens gets a little off, causing some ovens to run hot and others to run cool. This is why recipes tend to say things like “10 to 15 minutes or until golden brown.”
So, if it takes you longer than expected that’s fine, don’t worry about it. Just keep baking until ready.
WHY DID MY RECIPE COME OUT TOO DRY?
Just like some ovens run cool, others run hot. If you’re oven runs hot, bake these at a lower temperature. Ideally, you should get an oven thermometer to know what temperature you’re really baking at.
Recipe Tip:
Do not substitute the filling for Nutella or chocolate spread. Many recipes, even ones in Hebrew, recommend doing this. I tried it once while making babka thinking it would save me time. When I pulled it out of the oven the top looked great, but the flavor was barely noticeable.
Rugelach SNAFU:
I made some triangles too wide so they came out huge or too narrow so they had no shape. Also, I made the mistake of letting them rise too much so they were too round and too cakey.
Chocolate Rugelach
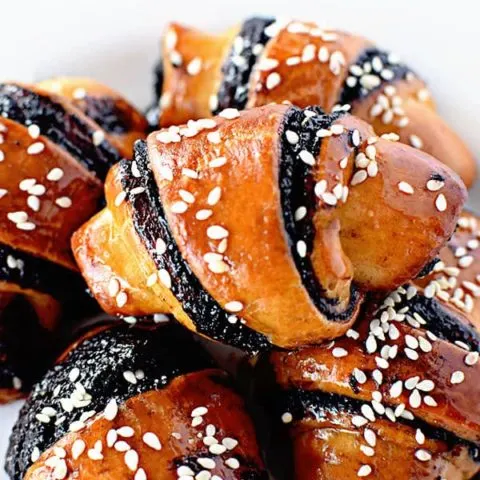
Chocolate rugelach are arguably the most popular dessert in Israel. These are similar to the ones you can find in any bakery in Israel.
Ingredients
Dough
- 3 ½ to 4 cups all-purpose flour (420 to 480 grams)
- ⅓ cups white sugar (65 grams)
- 1 teaspoon instant dry yeast
- ½ teaspoon salt
- 2 eggs
- ⅓ cup oil* (80 milliliters)
- ¾ cup warm water (180 milliliters)
Filling
- 1 cup cocoa (125 grams)
- ⅔ cup white sugar (135 grams)
- 1 teaspoon cinnamon
- ½ cup oil (120 milliliters)
Topping
- 1 egg, beaten
- ¼ cup water (60 milliliters)
- ¼ cup white sugar (50 grams)
- 1 tablespoon sesame seeds
Instructions
- Combine flour, sugar, yeast, and salt in the bowl of a stand mixer.
- Add the eggs and oil. Mix using a bread hook attachment.
- Add the water a little at a time until the dough is sticky but not wet. Mix for 5 minutes or until the dough pulls away from the sides. If the dough is too sticky, add a tablespoon of flour at a time until you get the right consistency.
- Cover the bowl with a damp towel and let the dough rise until double in size.
- In a mixing bowl, combine cocoa, sugar, oil, and cinnamon to create the filling.
- Divide the dough into two equal parts. Roll out half the dough into a horizontal rectangle on a well-floured work surface. You want the dough to be very thin, but not so thin that it rips when moved.
- Spread about ⅓ the filling over the dough. Then, fold the dough over itself towards you. Spread another layer of filling. Cut the dough into triangles, creating a zigzag pattern. Do your best not to make them too wide or too narrow.
- Start from the widest part of each triangle and roll your way down to the tip. Place the rugelach on a parchment paper lined baking sheet about 1'' apart.
- Repeat these steps with the remainder of the dough and spread.
- Preheat the oven to 360°F or 180°C. Let the rugelach rise until the oven is ready. Generously brush with remaining egg.
- Bake for 30 minutes or until golden brown.
- Mix remaining sugar and water in a pot. Heat to create simple syrup. Spoon the syrup over the rugelach and sprinkle the sesame seeds.
Recommended Products
Some of the links below are affiliate links, which means that if you choose to make a purchase, I will earn a small commission. This commission comes at no additional cost to you.
Nutrition Information:
Yield:
38Serving Size:
1Amount Per Serving: Calories: 252Total Fat: 6gSaturated Fat: 1gTrans Fat: 0gUnsaturated Fat: 5gCholesterol: 15mgSodium: 35mgCarbohydrates: 43gFiber: 2gSugar: 7gProtein: 6g
Yafit
Friday 7th of July 2023
How come my dough is not doubling in size?
Chaya
Thursday 24th of August 2023
@Yafit,
Mine didn't either. The air conditioner is on and I think it's too cold. Put it in the microwave in a bowl covered with plastic wrap on the LOWEST power for 5 min. Make sure it's on the lowest power possible. But it might also be your yeast which you need to test.
ElissaBeth
Friday 4th of August 2023
Either your yeast isn't alive or the area you have them rising in is too cold.
Susan
Monday 19th of December 2022
Before I make this recipe, I have a question. My daughter is now dairy free because her baby is dairy intolerant and she is nursing. One of her favorite holiday recipes is apricot rugelach. Is there any reason I couldn’t substitute the filling with apricot jam and nuts and cinnamon the way I usually make my rugelach? I know she would prefer that to chocolate. (Everyone loved your dairy free corn muffin recipe!!) Thank you! Susan💫
Susan
Tuesday 20th of December 2022
@ElissaBeth, Thank you for your quick response! I’m planning on trying it tomorrow. I’ll let you know how it turns out. Susan 💫
ElissaBeth
Monday 19th of December 2022
I am glad to hear everyone loved my day free corn muffin recipe! I don't see any reason you couldn't replace the chocolate filling with your usual apricot jam filling :)
Thursday 17th of November 2022
Rugelach were delicious, but 30 minutes was way too long for my oven. I baked them 25 min and wished I’d taken them out 5 minutes before that.
Ems
Thursday 17th of March 2022
How long does the whole process take? I have been wanting to make this.. it looks really good! We just came back from Israel a few days ago. And this was one of my favorite treat!
ElissaBeth
Wednesday 6th of December 2023
It's really impossible for me to say because rising times are drastically different depending on the heat and humidity of the room. However, I'd expect it to take at least two hours.
Alex
Tuesday 11th of January 2022
I made these yesterday, not ever having had them before, and not knowing what to expect. But what a delicious surprise! I did add some finely chopped semisweet chocolate to the filling and would add even more next time. The dough was lovely to work with and I loved the texture of the finished product. The American rugelach I’ve had can be delicious but heavier in the stomach and I hate rolling out the cream cheese dough. These will become a regular bake around here I think. Thank you so much for sharing your recipe!
ElissaBeth
Thursday 17th of February 2022
You're welcome! I'm so glad to hear you enjoyed them so much!